Author: Geoff Winchester – G24Hockey.com (full bio at bottom of article)
I am lucky to have had the opportunity to work with a number of NHLers training their bodies and minds to ensure they can handle the demands of their job and perform optimally every night. But I learn from them way more than I teach. It is for that reason that I am writing this, I want to share with you one of the greatest lessons I have learned from these guys: the importance of game preparation and a solid game day routine. In the end, preparation is the key to reaching your goals, fulfilling your potential and, most importantly, giving your team the best possible chance of winning every night.
The Three Pillars of a Pre-Game Routine
There are three pillars to a pre game routine: Nutrition, Physical, and Mental. Each pillar has it’s own set of principles that must be followed, but they intertwine and work together to ensure one’s mind and body are in the best possible state to compete.
What is the best pre-game routine?
The best pre-game routine is one that will make you feel unstoppable, the one that will change your game! Unfortunately there is no one routine that works for everyone, building a pre-game routine is all about fulfilling the principles of performance with food and exercises that what work for you.
Below is a road map that outlines what a pro’s game day routine is like with respect to the three pillars. After reading it, head to g24hockey.com or the app store for access to 14 actual pro game day routines where you can pull what you like from each player to build the routine that works for you. Each pro shows you what they eat when they eat it, their actual warm-up and cool-down, and their mental approach to the game.
How to Prepare for a Hockey Game
The steps below will give you a template for preparing for a hockey game. Remember that this is how pro’s do it, if you play at a rec level you can take a few bits of info to help where help is needed (stretching, nutrition, etc)
Night before
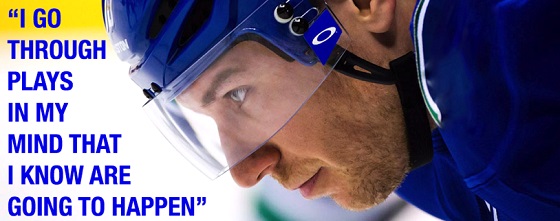
Mental: the mental approach to the night before a game varies from player to player. Some like to go to bed with a clear head, so they choose to read or watch a movie, while others like to think about the competition and the job they have to do the next day. Some players go as far as visualizing themselves playing the game.
Do what makes you feel comfortable and allows you to have the most restful sleep possible.
Physical: Pros take their sleep very seriously, even though their schedules can be erratic because it is crucial for recovery and performance. The hours of sleep before midnight are better than those after, so get to bed early if possible.
Nutrition: For this meal pros consume a lot of vegetables, high amount of protein and slow acting carbs. This combination helps the recovery process from any physical demands encountered that day and it also helps keep the immune system strong.
Morning
Nutrition: Start the day with a large breakfast, but limit the fast acting carbs (no captain crunch, or white toast) because you will crash within an hour. If you are serious about performing make sure you start drinking water at breakfast and continue doing so all day long.
Physical: Pros don’t hit the snooze button, when it is time to get out of bed they wake up and start moving. Have a shower right away if you need to, just don’t stay in bed as it will mess with your energy levels throughout the day.
Mental: When playing at the highest level you start gathering information about your body first thing in the morning. To start the mental process, think about how you feel when you play your best and then commit to the rest of your routine which is designed to get you to your optimal place.
Afternoon
Pregame skate (physical): The pregame skate is the time where pros work out the kinks; they are testing themselves and their bodies, gathering information throughout. It is also a good time to begin focusing on skills they know will be called upon during the game. Pregame skates are light skates with lots of flow.
If you don’t have a pregame skate, do some sort of physical activity; stickhandle, go for a bike ride, kick a soccer ball. It is important that you get moving long before the puck drops.
Mental: Ask yourself how your hands felt, how your edges felt, did your body feel loose? Knowing that you are doing the right things to get your body ready to compete will get your head in the right space.
Pre-game meal (nutrition): Team pregame meals happen right after the pregame skate, usually at 12:30-1pm for 7pm game. This is where you need to get slow acting carbs in you, best sources are pastas and rice, and make sure to have some protein with it… And continue the hydration process.
Before the game
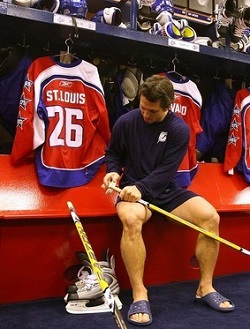
Physical: Just before putting on their gear pros complete a dynamic warm-up, most follow a same warm-up structure it’s only the exercises that differ based on their needs. The warm-up is essential for getting your body ready to go, if you warm-up properly your legs will be in the game before the first puck drops.
To get your body primed like a pro follow these steps:
body temperature increase
fascia release
joint mobility
neural activation
power production
Mental: At the beginning of the warm-up the mood in the dressing room is light and most guys have fun while sharing a few laughs; but as the warm-up ends it’s time to start focusing on the task at hand.
Most players, whether they know it or not, engage in visualization and/or focus techniques. The key to visualization and focus is to keep it simple, don’t overwhelm your mind; if you are thinking too much you won’t be able to react.
Nutrition: The last major part of fueling comes in the form of a snack, roughly 2.5 hours before the game; it’s easy to eat this just before heading to the rink or whenever they arrive. The snack should be high in slow acting carbs and easily digestible, this will allow for a quick start and to prevent a crash later on. A simple snack is a whole wheat bagel with peanut butter, or a muffin with fruit.
Post-Game
Nutrition: One of the most important meals is your post-game meal. It replenishes your energy stores, promotes muscle recovery and growth, and keeps the immune system high, all of which allows a pro to consistently compete hard the same way all season long.
As soon as you are undressed, consume a source of fructose (a sweet fruit like pineapple, or grape juice), then 15-20 minutes afterwards, have a full meal that is high in protein, slow acting carbs, and different colors of vegetables.
Physical: Cooling-down properly is essential to reduce the risk of injury and to keep the skating stride long. Stretch out the muscle groups that get activated during the game (e.g., hip flexors, low back) and pay extra attention to any body part that is excessively tight. Finish with a cold tub or some contrast therapy. This is what the pros do to get fresh blood/nutrients to the broken down tissues expediting the recovery process.
Mental: Dwelling on the past is wasted energy; however, learning from it can make you a better player. The advice I have received from the pros I work with is take a step a way from the game for the night and analyze your play the next day when your emotions are in check. From there, build on your successes and make sure you do not repeat the same mistakes.
Need Help with Your Pre-Game Routine?
This article gives you the basics of how the pro’s prepare for a game, but what will your pre-game routine look like? If you want some help building and customizing your pregame routine head to G24Hockey.com. Learn more about the app below, all the information is also available online.
G24 has a great app and web platform that allows you to get detailed access to Pro hockey players pre-game routines, meals, warm-ups, mental prep and more. They also allow you to customize your own pre-game routine based on the pro’s advice.
Geoff Winchester, MA (Performance Psychology), BSc. (Honours in Human Kinetics), Certified Exercise Physiologist Chief Product Officer
Geoff works closely with professional and amateur hockey players guiding their nutrition regimens, strength and conditioning plans, and mental approach to the game. His education combined with his hockey experience (tier 2 Jr A, CIS) has helped him thoroughly understand and manage the demand that hockey places upon a persons’ mind and body. He also has experience working with Canadian Special Forces; Canada’s elite soldiers, who he considers world-class athletes both mentally and physically. Geoff’s passion is helping people understand what they need to do to be their best and helping them develop and execute a plan to get there.
In order to be a great skater you need good balance. New hockey players are usually off balance, bow-legged, stutter stepping and some look like they just finished riding a horse for 6 hours. Why do new hockey players look so out of place on the ice? Because they don’t have good edge control. Learning […]
As part 2 of the backhand challenge (be sure to sign up to our newsletter to join our next challenge!) I wanted to teach you how to get more power on your backhand shots. In this post I have a new video for taking backhands from further away, as well as a number of videos from the pro’s unleashing awesome backhands. There are three steps to having a great backhand shot in hockey, I will explain them all in the article and video.
3 Steps to a Great Backhand
Puck Location – You want to release the puck when it is roughly lined up with your front foot. Using this location as your release point allows you to get your body weight behind the shot, add more power through weight transfer, and build more speed on the puck with the set-up and execution of the shot.
Blade angle – The blade angle when you release the puck is important. I think most people who can not lift their backhand probably do not open their blade enough. If you watch the pro examples below closely you will notice they all open the blade of their stick and then unleash all their power into the shot
Explode – This last tip comes from weight transfer and timing, but also includes the movement of your hands and arms. I notice that most guys with good backhands prep the puck, and then unleash everything they’ve got on it. It doesn’t seem like too many guys do a long sweeping backhand shot, it’s almost more like a backhand snapshot. Watch my example above and the pro examples below to see what I mean
Pro Examples of Great Backhands
Crosby pops the water bottle
Here is a game situation backhand from Crosby. Notice at the 33 second mark he has the puck cupped to control it’s location. He has the puck lined up with his front foot, and then in the next frame he opens the blade and lets it rip. Also notice after the shot his back leg is extended, which is a result of pushing with the back leg to get more power on his shot
Datsyuk Backhand
This is a good example of turning the feet first, and then letting the backhand go. Turning the feet also allows you to get more torque on the shot. With your feet turned more towards the net you can rotate your body more into the shot and get more power, watch the magician himself
Here is a near identical goal, notice how he cuts towards the net while he’s shooting. This helps get more energy moving towards the net for a harder shot.
Zetterberg Backhand
This is an amazing snipe by Zetterberg! Check the 22 second mark of this video to see his position. The puck is forward in his stance and he has the blade opened up. He is also leaning in towards the net, next he does a nice snap motion to put the puck in an almost impossible opening.
How can you improve your backhand?
Take the tips from this article and my video as well as the tips from my roofing the backhand video and article and start shooting!
Make sure you have what you need to shoot at home. A shooting pad and net are all you need, see my favourite hockey products if you are interested in some good training aids
Set a schedule to improve your shot. Make a goal to take 50+ shots a day and stick to it. As long as you know the proper form and work each day to improve your technique you will improve your shot very quickly
You can use my iSnipe app for Apple or Androidto help keep track of how many shots you take each day and learn how to take each shot, the app has 16 training videos.
We are on day 2 of the backhand challenge to shoot 1000 backhands in one week (if you want to know about future challenges be sure to sign up to our newsletter and Facebook page). After one day of shooting on your own I wanted to deliver some fresh tips for shelfing the puck when you are in close. In this post and video I explain the simple three step process to going top cheese!
Three Steps to Lifting the Backhand
This method is best used while in close to the net
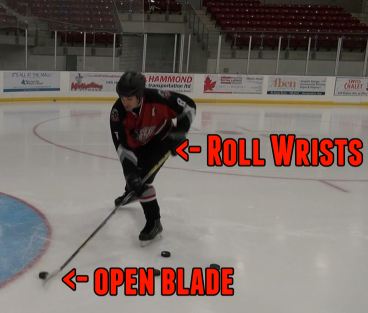
Puck location
The puck should be positioned forward in your stance to help you get the proper blade angle to lift the puck. A good puck position is not critical, however it does make the shot easier. Good players will be able to lift the puck from various locations, however it’s easier if you start from an easier position and work your way up.
Wrist Movement
Starting with the wrists rolled and the puck cupped is important so that you can later quickly uncoil the wrists. This movement will add some momentum to your shot and help you easily lift the puck off the ice
Leverage of the Stick
The final stage of this shot uses the hands and stick to add power and lift. You will be pushing down with your top hand, and pulling up with your bottom hand (quickly) in order to lift the puck up off the ice. When all three stages are used together (and with a bit of practice) you should have no problem roofing backhands.
Two Tickets to Bardownsville – Video Tutorial
Thanks for watching. If you want more tips you can subscribe to our website below. We also have buttons below to share this page
Building a backyard rink is a great way to play hockey at home with friends. Unfortunately you can’t just toss a rink up, there is a right way to build a rink and many wrong ways. This article will help you learn how to properly build a rink suitable for your family. I have entrusted Jim Stoller from NiceRink.com to write this article as he can draw on many years of experience.
ICE is ICE, but for 21 years, since 1991 and 10’s of 1,000’s of NiceRinks in people’s yards later, we’ve got a pretty good handle on what to do AND ALSO what not to do. Most of what we’ve learned, written and solved has just been reworded and reposted by others. Since 1991 the goal has been SIMPLE SOLUTIONS for the backyard rink builder. With time comes experience; with experience comes knowledge, knowing how to use that knowledge is what counts.
Let us help you be successful with our Experience and Knowledge!
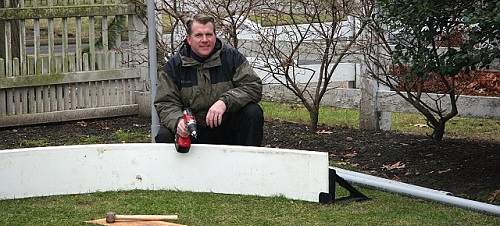
Hello Everyone, Jim Stoller, President of NiceRink here. A quick background of myself, NiceRink and its 65 year history. That’s right, our main company has been in the plastics industry since 1948, bringing you three generations of plastics know-how to back up our over 150 years of family hockey/skating history. A hockey history that includes playing, coaching, hockey directors, being a dad coupled with multiple state & national titles and years of Junior “A” experience. We don’t just make and provide backyard rink products; we live and breathe hockey and everything that comes along with it.
How cold does it have to be? When can I skate?
The obvious answer to this is 32F/0C. The more intricate answer and what clients really want to know is, after I fill the rink up when can I skate on it. That answer has many variables depending on how and what you build/liner your rink with and the lovely weather.
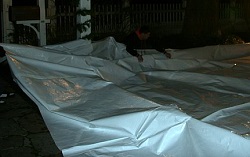
Best case scenario is that you’re utilizing a WHITE liner to prevent heat absorption from the sun. Using a liner that holds the water, your deep end should be no more than 10”/25cm deep. The outside of your boards should be light in color or covered with the white liner at the start to prevent heat absorption. Let the ground cool down for a good amount of time before lining and filling. If you have all those BCS factors in place and you wait until your NIGHTS are getting to 23F/-5C to 18F/-8C and your DAYS aren’t getting too much warmer than 36F/+2C, you should be able to skate in 3-5 days.
The cold nights are the trick assuming everything detailed above is in place. You’ll build more ice during those night time temps than the daytime temps can melt. Therefore you will be gaining ice thickness each night. “Usually” 3”-4”/8-10cm will hold most kids and average size adults.
Will a backyard rink wreck my grass?
Depending on how you build your rink and what type of liner you use, will determine the health of your grass. With a WHITE liner and the FLOOD method, we have seen a 99.9% effective rate in turf health. On the other hand, if you use a clear, blue “tarp”, black liner and/or just flood the grass, that % goes way down. Several factors are the cause: Not enough sun penetration, too much sun penetration, flooding the root zone of the turf are all causes of dead spring grass.
How big can I make my rink? What size should it be?
The size of YOUR rink should be determined by several factors. The first factor is your available space. If you have the space and budget, go big. You’ll enjoy your rink much more when you have more room, especially when you have skating parties (which I can assure you, you will). Everybody will have plenty of room to skate around without bumping into each other. If you’re not sure if you’ll use your rink enough to make a big rink worth your while, start smaller. You can always decide to go bigger in a year or two, and continue to use the boards and equipment that have already been purchased.
Besides space and budget, the people that will be using the rink will determine the size as well. When your rink is just for children, you can go with a smaller 20’ x 40’ (6M x 12M) rink and be very satisfied, as they don’t need a huge rink to make it feel huge to them and you’ll be able to expand it going forward. The picture to the right shows a 20 x 40 ice rink
On the other hand, if you’re an experienced skater yourself, you’ll be able to cover a 30’/9M span rather easily with one stride, which doesn’t end up being really fun if you’re an avid adult skater.
As a quick “guideline”, when my son was 17-18-19 Jr A, the boys came over and our NiceRink was 44’ x 88’ (13.4M x 26.8M) and it served them very well for 3 on 3 and even were able to play some 4 on 4 with the BIG boys out there.
The choice is entirely up to you, the “rink manager”, but I can tell you I’ve heard time after time, “I sure wish we would’ve made it bigger!” Also keep in mind when deciding size, that plywood and other NiceRink rink materials come in 8’/2.4M and 4’/1.2M sections. This means rinks with widths and lengths divisible by eight or four are the easiest to put up and will have less wasted material. As a general skating guideline, about 100Sf/3.5Sm per skater will allow for all on the ice to have ample space to skate without bumping into each other all the time. The rink to the right is a 52 x 100 ice rink
Does my yard have to be level?
I’m not aware of a single yard that is “flat”. That said, no your yard does not have to be level. You just have to make sure to measure your slope BEFORE you start acquiring components and building the rink boards. WAY easier to know the pitch and build it right the first time, than it is to find out later with 16”/41cm of water in the deep end against a 16”/41cm board and no water in the shallow end. A simple video showing checking slope/pitch can be seen below
Buy It or Build It?
This basically comes down to time vs. money. There are a LOT of great problem solving NiceRink products available that you can simply “install” instead of having to “build”. Custom NiceRink Brackets, NiceRink Boards, BumperCaps, KickPlates, Nets and endless other options. Then there are always those people that are very handy and have the tools AND the TIME to create their own board system. That’s fine too! It can be as simple as a bunch of 2×4 (5cmx10cm) wooden stakes and plywood, or as eccentric as a complete refrigeration and board system and range from $200 to $100,000 and virtually anywhere in between! Once it’s built, filled & frozen….ice is ice! It’s just how you get there.
When should I build my rink?
The best time to build/setup your backyard rink is just prior to the weather turning freezing. This is for two reasons. First, you want to be all setup and ready to fill/flood when the cold arrives, not setting up. Secondly, it’s a heck of lot easier and more comfortable to be working outside and installing stakes/brackets into the ground when it’s 50F/10C and the ground isn’t frozen.
When should I fill my rink?
The best answer for this is not a date, but rather the weather forecast. As a rule of thumb, in Southeastern Wisconsin, I usually install my brackets and sideboards the weekend before US Thanksgiving around November 15th or earlier and lay out the liner 2-3 weeks after. By giving it a good 2-3 weeks, it will also give the brackets and boards a chance to “freeze in” and let the grass go dormant. By then you’ll have those good cold nights mentioned in item #1. This will obviously vary greatly depending on where you are located.
How much does a Back Yard Rink cost?
As stated above, it can range from just your time to spray water, to $340.00 for a NiceRink 20’ x 40’(6M x 12M) Starter Kit, to $3,800 for a 44’ x 88’(13.4M x 26.8M) NiceRink Gold Package to $25,000 for a 20’ x 40’(6M x 12M) Refrigeration system. Anywhere in between and higher, all depends what you want to do.
Let’s go into detail on each of those cost options for you, keeping in mind there are virtually an unlimited variety of cost options to suit anyone’s budget and/or rink size:
$0 = Lots of time and must have cold weather. If you live in say Winnipeg where it gets and stays cold this may be an option for you versus someone who lives in say Central Ohio. Once the ground freezes and you get some snow, pack all the snow down to compact it, spray it lightly to saturate the snow to a “slush”, let that freeze and then spray thin layers over the top of the frozen slush to “build” you ice.
$340.00 = NiceRink 20’ x 40’(6Mx12M) Rink-in-a-Box. Great-Simple start to your backyard rink endeavors. This is a “key components” kit to get you going and then you can expand upon going forward. You’ll still need 3-5 sheets of ¾”/1.9cm plywood which will run another $200-300, but you can use them to make your rink bigger in the years to come.
$3,800 = 44’ x 88’(13.4M x 26.8M) NiceRink Gold Package. This is a complete kit including NiceRink Brackets, NiceRink Plastic Boards, NiceRink Liner, KickPlates, NiceIce Resurfacer, BumperCaps and more. Everything in the NiceRink product family is made to last. Be confident in buying once and passing it on or reselling it down the road. The only real replacement item would be the NiceRink Liner as discussed in section #9 below.
$25,000+ = 20’ x 40’(6Mx12M) regular refrigeration system with Coils, Anti-Freeze, Refrigeration Compressors. This will of course pretty much guarantee ice, but the cost is quite steep, and you’ll have an increase in your electrical bill as well.
Rink Liners vs. Plastic vs. Tarps
This topic could easily dominate backyard rink discussions as this is probably the most crucial element to having a successful outdoor rink experience.
WHITE-WHITE-WHITE-WHITE! Make sure to get an Ultra-White liner on *BOTH* sides!
To help keep your ice as cold as possible by reflecting the UV rays away from your ice
To save your grass! Clear & White/Black liners as well as Blue Tarps are known grass killers, BUYER BEWARE!
NiceRink Liners vs. Woven Tarps: NiceRink Liners are 5, 6 or 10 mils of solid water holding poly. Woven Tarps on the other hand are yes maybe 6, 10 even 12 or 14 mil thick, however the bulk of their thickness comes from the woven reinforcement in between two very thin ½ to 1 mils of coating to hold the water. The reinforcement doesn’t hold water; the poly is what does that. Once that ½ mil coating is compromised you you’re basically left with a woven fabric that doesn’t hold the water. They are heavier and harder to work with. Also, thicker doesn’t always mean better. NiceRink’s layered liners at .005 mil are 50%+ stronger than most others .006 and even .008. You’ll get what you pay for…..Be informed.
Get the ONE-PIECE size you want. NiceRink has ELEVEN different widths IN STOCK available in ANY length you’d like. No need to buy extra and throw it away in the landfills. No waste!
Liner warranty: NiceRink liners are warranted to hold the water when you get it. Some warranties on the market are for a 5 year “UV warranty”. That’s fine, but UV damage is not going to be the problem as the liners are covered with snow and ice during usage, so the UV doesn’t affect the liner. You need a good strong liner to do the work and add KickPlates if at all possible.
Liner life expectancy, everything except the liner will last for many-many years, most likely 10-15+. The liner life on the other hand, will be determined by two things:
What the rink is being used for; Hockey or just general skating.
How the inside edges of the liner are protected. The inside edge of the rink right at ice level is the most vulnerable part of any outdoor temporary rink system. If the inside edges are not protected with KickPlates, the liner will be continually hit with sticks, skates, pucks, toe-picks, etc. That area will have little nicks and cuts in the liner. If that’s the case the liner, no matter what you use for a liner, will be a one year liner, or you’ll have to shrink your rink the following year so the little nicks/cuts are above the water line. If the edges are protected at ice level, you can expect 2-5 years of life out of the liners. Regular Poly liners, probably 1-3, NiceRink #1 & #3 2-5 depending on the rinks use and how the edges are protected.
How thick does the ice have to be to skate on?
A good finished shallow side ice thickness is 4”/10cm. The deep end will be determined by the pitch/slope of your site. If you have an 8”/20cm pitch, then you’ll have 12”/30cm of water on the deep side. 4”/10cm will give you a good solid base to work with and usually enough thickness to maintain ice during the mid-winter thaws that have become unfortunately all too familiar.
Should I fill the rink up all at once or do it ice layer by ice layer?
There’s a lot of back and forth on this topic. Usually people layer because they are not using a liner, with a liner you can easily fill and forget. In my opinion there’s no reason not to use a liner other than the money a liner costs. Layering the ice will create a stronger ice block as long as that original ice block doesn’t melt or get soft. Filling a liner will take WAY less time and give you a great base ice to work with.
Using a liner might take 30-45 minutes to install; layering ice could take weeks and sleepless nights of spraying. Once a liner is filled to 4”/10cm of water on the shallow end, let it freeze and done. This first ice will be more like pond/lake ice. That means it will be a “softer” ice containing small air bubbles and you can cut into it. Once it stays cold and you can layer your top coats during resurfacing you’ll then build that hard ice you’re looking for on top as long as that top layer stays frozen.
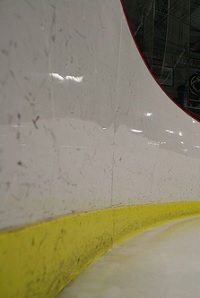
There’s water around the edges my rink?
All rinks built with a liner will have a shallow end and a deep end. The water the rink was flooded with will ALWAYS freeze from the top down. Most of the time it will NOT freeze all the way to the ground and there will be water under the ice, especially in the deep end. When you have the backyard game going and 2-3-4-5 skaters head to one corner, the weight of everyone will force the ice down, and subsequently force a little water up in between the ice and the liner. It will even “gurgle” sometimes. Most of the time it’s fine and the little water that does come will either retreat and/or freeze at the edge.
How to deal with slush on a backyard rink?
All is not lost! The BEST thing to do is nothing! If you have just filled your rink and it froze over with a little ice and you get a big snow storm, the weight of the snow on the ice will force the ice downward. The underlying water will be forced up by the weight and pressure of the snow in-between the liner and the ice, turning the snow into slush on top of the skating surface.
If your ice is too thin to get on and clean, you basically can do nothing. The best scenario is for the weight of the snow to push the ice down enough to force enough water onto the top of the ice so it ALL turns to slush. Let the slush freeze, and then you can skate on that base if it’s smooth enough or resurface a few times to get it back to smooth.
If it snows on ice that is already pretty thick, 5”+ and the slush is only around the edges of your rink, then you can tackle cleaning it off. Personally, I would call “more than a few friends” over to help with this. Once you start cleaning slush off of a rink DON’T STOP, it must ALL be cleaned off and smooth. Whatever you leave on the ice, such as left over slush, or stopping half way will freeze at night and your ice will be full of FROZEN foot prints, shovel marks or the step-up where you stopped. Once it’s cleaned off, let the surface harden back up, then resurface as needed to get it back to glass.
How much water should I flood/resurface with?
There are several methods of maintaining the ice. There is the flood method, spray and squeegee method, spray-spray-spray-spray, Hand Resurfacer and the Zamboni method. I’ll go through all of them in detail and you can make your own decisions for your rink, as you are the “rink manager”.
The Flood –The flood method is simply that, flooding. To flood the rink you’ll need to have the availability of large hoses and above average water pressure. You’ll need to get the entire rink completely covered with water before any of it starts to freeze. Do not use the flood method on smooth ice, you’ll wreck it.
Spray and Squeegee– Again, simply spray water onto the ice surface and squeegee it out to the spots that need the most attention. Do not try and squeegee areas that have started to freeze. You’ll end up with mounds of frozen slush, which will have to be chipped or scraped off later when they freeze.
Spray-Spray-Spray-Spray– The name says it all! The trick to spray coating ice is “wet ice is done ice”. In other words, start spraying a spot on the rink until it’s glossy and move on. Put the layers of water on as thin as possible to get a “Nice” glass like finish and also to prevent cracking or “lifting”. How water freezes will help explain this.
Water normally freezes from the top down and it also expands as it freezes. Therefore, if you put too much water on the surface and it starts to freeze, it will first freeze the top and you’ll have your base ice, a layer of water and the top layer of fresh ice. Three layers; base ice-water-top ice. The water in between the two ice layers will then start to freeze and expand as it does so. As it expands, it can only expand up into the fresh ice, therefore causing the “lifting” of the fresh top ice layer and making it bumpy and/or uneven again which is called “shale ice”. If thin layers are applied, it will freeze solid with no expansion to give you the glass like finish that ice-skating has become accustomed to.
The above mentioned method is the most time consuming, but will give you the best ice surface without the use of the NiceIce resurfacer explained next. A 44’ x 88’(13.4M x 26.8M) rink will take anywhere from ½ hour to 1 ½ hours by spraying to get the ice back in glass shape, depending on the temperature and ice condition you have to start with
NiceIce Resurfacer-The NiceIce ice resurfacer is the best and most economical method of resurfacing any ice rink. My personal backyard rink is 44’ x 88’(13.4M x 26.8M) and takes me a whole 12 minutes to put on a fresh coat of ice.
It used to take me at least an hour to spray coat a new layer of ice and now, as mentioned takes about 12 minutes or less, with less water and a much better ice surface to skate on when done. I usually put two coats on when I’m out and the second coat takes less time than the first and provides a surface that rivals indoor ice quality.
The single biggest detriment to ice is the oxygen/air contained within the ice. You’ll remember skating out on the ponds and lakes and when you made a sharp cut you’d get a big groove in the ice. The groove could be formed because too much air was contained within ice, allowing the skate to easily dig in and groove out the surface. Your base ice is basically the same as pond ice until it gets resurfaced and layered a couple of times.
While utilizing the Patented NiceIce resurfacer, you will be laying down a very thin, fast freezing layer of deoxygenated water that will then become your skating surface. You now have the same ice surface that is laid down on the indoor rinks and sometimes better as air temperatures determine outdoor ice quality. Indoor ice is kept at about a constant 21-24F/-6-4C degrees. Your ice can be as cold as the outdoor temperature, 15F/-9C, 10F/-12C, 5F/-15C and so on.
Hard, de-oxygenated ice is good, fast ice and will not get chewed up as much. It requires less maintenance time so there’s more skating time!!!!! The NiceIce resurfacer is also great when Mother Nature doesn’t cooperate like we would appreciate her doing so. When she dumps snow, rain, sleet or slush, it has a definite tendency to mess up a rink surface very quickly. The NiceIce resurfacer can lay down approximately ¼”/.635cm to ½”/1.3cm inch of ice in an hour, depending on the outside air temperature which usually takes care of even the most severe rink surface in a maximum of 3-4 hours of walking.
Ice cracked, how can I fix it?
Inevitably when it gets cold the ice will obtain some cracks. You can do two things to get them repaired and help prevent further cracks
Just like you may have seen on TV or the local rink when a hole is created in the ice, the ref/players will scrape some ice shavings, pack them in the hole, wet it and then smooth it over with a puck. Same goes for your backyard rink. Grab some snow, assuming you have some, and pack it in the holes and cracks, wet lightly and smooth over the best you can with a puck, or even a concrete trowel and let it freeze.
Before you get any cracks and/or when you fix any holes/cracks you have in the ice, and it’s cold enough and going to stay cold enough to keep your ice frozen, you can and should put many “thin” layers of water/ice on the rink, letting each layer freeze before adding another layer. This will give you a harder ice surface on the top and be less prone to cutting, chipping and cracking as long as it stays frozen.
ALL in ALL…..A backyard rink can bring you years of unlimited Frozen Memories to last you, your family and friends for a lifetime. The choices at NiceRink are infinite, the possibilities are limitless, and our product reputation is second to none. Backed up by a superior customer service staff and years of knowledge to help you.
The right decisions make all the difference!
Thanks to Jim for writing this detailed Q & A. You can find more information about his products and services below
www.NiceRink.com or Toll Free at 888-NiceRink for Superior Products, Superior Knowledge & Superior Service.
If you browse the how to hockey website enough you will find that the fundamentals of every shot have been covered in detail, most of you who have been following how to hockey for a while should have a good grasp on each shot, so now it is time to take your shot to the next level.
In the video below I share three off ice training methods that you can use to improve your shot on the ice. These training tips will help you with game-like shooting situations. I mostly focus on the quick release and accuracy as these are very important in the game
Advanced Off-ice Shooting Tips
In this video
Shooting in stride
This is important to practice if you want a quick release without giving any clues. Sometimes you will see an opening and you need to take advantage of it right away. If you are too slow to get your shot off the chance may quickly be taken away.
Changing the point of release
This is very important if you are shooting on a goalie that has taken away your shooting options, or you are being covered by a defencemen. Learning to pull the puck in towards your body and shoot it quickly will help you find more scoring opportunities and get more shots on net.
Toe shots
These are great to practice if you want a deceptive shot. As a hockey player you need to learn how to be accurate with a variety of shots. Sometimes the puck will be at the toe of your stick and you will need to shoot it. The toe shot lets you change the angle, hide your release, disguise where you are shooting, and use the stick to generate a bit more power.
In this article and video Ken delivers three tips on how to use the boards in the defensive end. The boards are a great tool to have, and as a defensemen you should know how to use them. There are a few ways that you can use the boards or the glass to elevate your level of play. When you get the puck in the defensive end your number one goal is to move it out of your end, and hopefully also maintain possession. In the video Ken shares 3 ways to effectively use the boards and 5 different plays that you can make.
5 plays you can make using the boards
Using the boards as a Defensemen
Here are some of the points that we covered in the video
You can use the boards when you need to protect the puck, keep your knees bent and have some weight on your stick so you are not easily knocked off the puck. Remember your legs are the most powerful muscles, so keep them moving during the puck battles. You can also use your hands for leverage and support
Sometimes you need to make a cross ice pass to your defensive partner. If you are close to the net you do not want to put the puck right in front of the net. Use the boards behind the net to bank pass the puck to your partner.
A hard rim is a good way to get the puck up the ice quickly, but remember your winger needs to know how to handle a rimmed puck, and it usually takes longer to recover than a direct pass. Use a hard rim when you need to clear the puck quickly, it’s usually a safe play, but not always the best one
A bank pass up the ice is another good play to use, sometimes you want to make a pass to a centermen or winger who is crossing lanes, if this option is taken away then look to the boards. You may see a clear bank pass that will still get the puck to your forwards.
Another way to use the boards is by clearing the puck high and off the glass. This is usually your last option and only used when you really need to get the puck out. It’s like pulling the cord on the emergency chute
These tips should help you see the ice a little differently. Remember direct passes are great when you can make them, but usually the other team will try to take away passing lanes. You can look to the boards when your direct pass options are taken away, you need to move the puck up ice quickly with a hard rim, you can’t move the puck and need to battle or “eat the puck”, or in case of emergencies, throw it high and off the glass.
In this article we have three hockey tips from George Parros of the Florida Panthers. Parros has played over 400 games in the in NHL, won a Stanley Cup with the Ducks and has a great Mustache! In the videos Parros teaches a trick shot, how to take a snapshot, and shares some tips for the forwards crossovers.
Thanks to H20 Overdrive for setting up this opportunity with George Parros, although I would have liked to see some tips geared towards his physical style of play, maybe later we can do a video with tips for intimidation and dropping the mitts.
How to take a snapshot with George Parros
In this video Parros teaches his style of the snapshot which many NHL players use. This is a great shot to use to incorporate a lot of power and a deceptive release. This snapshot is a hybrid between the full wrist shot and the quick release snapshot that I taught in another article and video.
Forward Crossover Tips with George Parros
Parros has some great tips in this video. His advice will help you make a tight turn while using crossovers but also maintain good body position and balance. Once you have mastered the forwards crossovers you can start working on your backwards crossovers
Trick Shot
In this video Parros teaches you how to pull the puck back and then flip it up in the air. If you are looking for some more trick shots you might like our video on how to do the scoopy puck move
Thanks for watching, for updates on new articles and videos just enter your name and email address in the box below. You can also share this article on Facebook or Twitter using the buttons below.
Now that it is halfway through the season your hockey equipment has likely acquired a wonderful and unique odour, a stench that would put a skunk to shame. Don’t worry, I am here to help, in this article I will teach you how to prevent (or delay) your hockey equipment from stinking, and also how […]
I have been working with HockeyShot.com lately to produce a series of hockey training videos. The videos come in two parts, how to perform a certain skill, and another video on how to improve that skill at home. The on-ice videos are on my Youtube channel and the off-ice videos are on the Hockey Shot channel. In this post I have embedded all of the off-ice videos to help you learn to improve your shooting at home.
In each video I give a few simple tips that should help you improve your shot. If you need a step-by-step breakdown of the shots you can watch the on-ice video.
Improve your Wristshot at Home
In this video I explain a few common mistakes that I see people make when they are shooting at home. I show you how you can correct these mistakes and improve the power of your wrist shot.
In these videos I am using a roll-up shooting pad, and the EZ-goal net. I always recommend a shooting pad and a good net to anyone who wants to work on their skills at home.
Remember my #1 tip for any shot is take 100 shots a day – the only way you can improve your technique is through practice.

 The best pre-game routine is one that will make you feel unstoppable, the one that will change your game! Unfortunately there is no one routine that works for everyone, building a pre-game routine is all about fulfilling the principles of performance with food and exercises that what work for you.
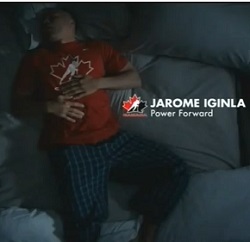 Mental: the mental approach to the night before a game varies from player to player. Some like to go to bed with a clear head, so they choose to read or watch a movie, while others like to think about the competition and the job they have to do the next day. Some players go as far as visualizing themselves playing the game.
 Nutrition: Start the day with a large breakfast, but limit the fast acting carbs (no captain crunch, or white toast) because you will crash within an hour. If you are serious about performing make sure you start drinking water at breakfast and continue doing so all day long.
 Pregame skate (physical): The pregame skate is the time where pros work out the kinks; they are testing themselves and their bodies, gathering information throughout. It is also a good time to begin focusing on skills they know will be called upon during the game. Pregame skates are light skates with lots of flow.
 Pre-game meal (nutrition): Team pregame meals happen right after the pregame skate, usually at 12:30-1pm for 7pm game. This is where you need to get slow acting carbs in you, best sources are pastas and rice, and make sure to have some protein with it… And continue the hydration process.
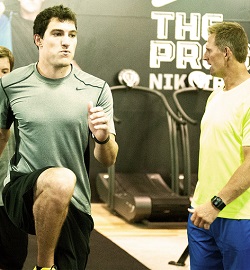 Physical: Just before putting on their gear pros complete a dynamic warm-up, most follow a same warm-up structure it’s only the exercises that differ based on their needs. The warm-up is essential for getting your body ready to go, if you warm-up properly your legs will be in the game before the first puck drops.
 Mental: At the beginning of the warm-up the mood in the dressing room is light and most guys have fun while sharing a few laughs; but as the warm-up ends it’s time to start focusing on the task at hand.
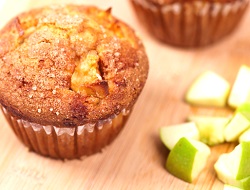 Nutrition: The last major part of fueling comes in the form of a snack, roughly 2.5 hours before the game; it’s easy to eat this just before heading to the rink or whenever they arrive. The snack should be high in slow acting carbs and easily digestible, this will allow for a quick start and to prevent a crash later on. A simple snack is a whole wheat bagel with peanut butter, or a muffin with fruit.
 Nutrition: One of the most important meals is your post-game meal. It replenishes your energy stores, promotes muscle recovery and growth, and keeps the immune system high, all of which allows a pro to consistently compete hard the same way all season long.
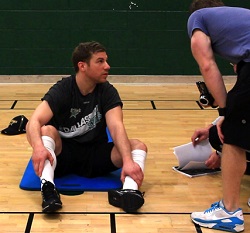 Physical: Cooling-down properly is essential to reduce the risk of injury and to keep the skating stride long. Stretch out the muscle groups that get activated during the game (e.g., hip flexors, low back) and pay extra attention to any body part that is excessively tight. Finish with a cold tub or some contrast therapy. This is what the pros do to get fresh blood/nutrients to the broken down tissues expediting the recovery process.


 Spray-Spray-Spray-Spray– The name says it all! The trick to spray coating ice is “wet ice is done ice”. In other words, start spraying a spot on the rink until it’s glossy and move on. Put the layers of water on as thin as possible to get a “Nice” glass like finish and also to prevent cracking or “lifting”. How water freezes will help explain this.
 NiceIce Resurfacer-The