Line-ups 9F and 5D or 8F and 6D
Views: 698 | Replies: 2

Views: 698 | Replies: 2
Views: 5468 | Replies: 3
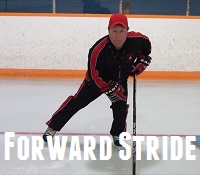
The forward stride is the most used movement in hockey, however many players neglect to try to improve it. Many players think that once they can skate and move forwards they are fine, however even PRO hockey players continue to work on their forward stride throughout their entire career!
The forward stride is the most used movement in skating, which means it should be the one you focus on the most. What can you do to improve your stride? Here are some areas that you might be able to improve
The key to a good forward stride
The forward stride consists of a push, glide and recovery. In order to have a smooth stride you should have good knee bend, a good push using your edges, good balance glide and knee bend in your glide leg and a fast recovery.
The key to speed is stride length and stride frequency. This is true when skating in a straight line, which happens with the forward stride. Once you get into higher level hockey we also want speed in lateral movement, crossover speed, pivots, agility, etc.
Thanks for reading! If you enjoyed this article or video please share using the button below
The other day I posted a few drills the select team used in the warm-up phase of their practice. Here are a few of the drills they used during the skill assessment portion of the practice over the three days. As I said in the earlier post, the coaches also ran a number of 3×3 small area games and standard 2×1 or 3×2 type of drills that I will not include because they are similar to drills already included on the site. I did get the chance to run a few of these at my practice on Monday night and they work really well.
ACHA-Continuous 1v1 With Support Or Backcheck
ACHA-Transition Strongside Weakside

Click to Download the Drills
![]()
On December 26th and 27th I had the opportunity to watch the ACHA Select team practice in Albany, NY in preparation for their trip to Europe to play in the ACHA Challenge. My 22 year old son was fortunate enough to be selected to be a part of this team as one of the defensemen and I had to drive him to the facility in NY and decided to stay the night and watch all three practices. The team is coached by Mike Forbes a former NHL player and currently the head coach at Grand Valley State University in Michigan. Coach Forbes has won a national championship and been selected as Coach of the year in his five seasons at GVSU. I was really interested to see how he would structure his practice sessions since he had just three sessions to get the team on the same page before they went off to Europe to begin play on December 29th.
The first session was mostly standard practice drills to get the team skating and to give him a chance to see what his team looked like. He also spent time walking through the defensive systems he would use. The second and third practice sessions had more detailed drills for specific areas of the team as well as 3 on 3 play. The practices were up-tempo and he kept things moving along at a very nice pace. The team looked good even as they were trying to find their way as a team.
In this first installment I’ll post the drills that were used in the warm-up section of the three practices. Drills that just had the team skating and getting the goaltenders ready. In part two I’ll post the other drills that I saw him run to develop specific portions of the team game. In all I picked up ten drills to post on the site and I also watched him run drills that are pretty standard type of 2v1 or 3v2 structured drills that I won’t post. Normally I don’t post anything that I haven’t run with my team first but since I was able to watch the Select team run through these drills I have a good feel for them and think they are solid drills for any of us to run with our teams.
ACHA-Cross-Ice With 7 Passes And Shot
Click to Download the Drills
![]()
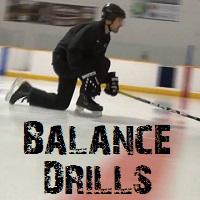
If you are dedicated to improving your skating, shooting and stickhandling then balance drills and edge work drills are going to give you the biggest results. You might be asking why would a skating drill help improve my shooting and stickhandling? I am glad you asked
Drills that help a hockey player improve balance will also improve other skills because without balance there will be no power or agility. A shot that is taken while off-balance lacks the proper weight transfer to generate full power into the shot. An off balance player can not properly execute the correct chain to take a good hard shot
 An off balance player will be easy to knock off the puck, and take the puck away from because as soon as they make a mistake in their footwork, or stumble for a second the player with better balance will catch up and take the puck away. A good stance, proper balance and good edgework is the base to good puck control
Oh yeah, you will also be MUCH better at skating!
The ultimate goal for a hockey player is to feel just as comfortable (if not MORE comfortable) in your skates as you feel in a pair of sneakers.
 Shoot the duck – Players glide on one leg and squat as low as they can while keeping their other leg out in front
Balance is one of the fundamental skills of skating, but there are many other building blocks that will help you improve. Visit our Learn to skate series to see our other videos and articles on the fundamentals of skating.
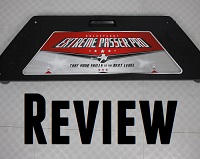
Want to work on your dangles, shooting and passing? The Extreme Passer Pro could be the perfect training aid for you! With this new rebounder from HockeyShot.com you can work on a number of different skills off-ice or on the ice
What is the Extreme Passer Pro?
Unlike the new Extreme Passing Kit – which is a rebounder and shooting pad in 1 – the Extreme Passer pro is a standalone pass rebounder that is designed to be used anywhere! All you need is a smooth surface like a shooting pad, smooth cement, or hockey training tiles. Of course you can also use it on the ice (like I do in the 2nd review video below)
In this video I give you a close-up look of the Extreme Passer Pro and explain all of the features
Extreme Passer Pro Specs
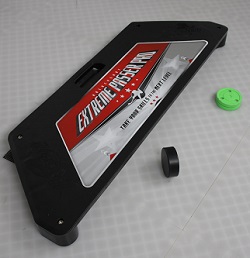
I really like the double bungee cord feature! There is a bungee cord at the front, and a smaller one at the back. This means you can use both sides by yourself and come up with some creative drills, or two people can use it at once.
Another cool feature is the built in allan key that is used to activate the spikes in the footings. The spikes will help the unit stay put while being used on the ice.
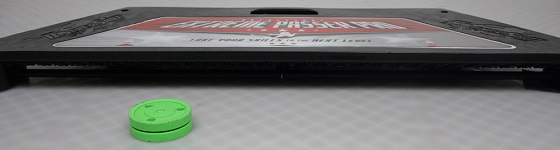
I am very impressed with how well it rebounds pucks. The pass back is very crisp and for the most part accurate. The only time you will get a bad pass from the rebounder is if you give it a bad pass.
The only time I found it was challenging to work with the Extreme Passer pro was from a distance, and when I was skating past the rebounder and trying to give myself a give and go or bank pass.
You can buy the Extreme Passer Pro on this page on HockeyShot. It is currently $149.95 but with our coupon code you can save $10 – coupon code: HOWHCKY001
In order to be a great skater you need good balance. New hockey players are usually off balance, bow-legged, stutter stepping and some look like they just finished riding a horse for 6 hours. Why do new hockey players look so out of place on the ice? Because they don’t have good edge control. Learning […]
The post Understanding Your Edges: 6 Edge Work drills to Improve Balance and Control appeared first on How to Hockey: Hockey Training and Hockey Tips.
From time to time you need to run 1v1 drills to work on those skills. Every player needs to know how to defend the 1v1 and how to create offense during the 1v1. Here is a selection of drills that I use throughout the course of the year to work on the 1v1 skills. As I stated in a prior post, I don’t allow my forwards to use the move where they put the puck between a defenders legs and try to go around him to pick it up again. In these drills I want my forwards to work on power moves to either the inside or the outside and to also use the defender as a screen and shoot through their legs. I also insist that they continue to work hard to the front of the net and look for rebounds. For the defensemen I want them to try and keep the rush to the outside whenever possible and to concentrate on the chest of the offensive player. My philosophy on defending the 1v1 is that the defensive player’s job is to ride the offensive player to the outside or off the puck and the backchecker should be there to pick up any loose pucks. Too often you see the defender look down at the puck to try and make a play and the offensive player goes right around him because of that look down. Keep your eyes on the chest and feel for the puck with your stick.
The one downside to running 1v1 drills is it causes a lot of standing around because only two players are working at the same time or four if you go in both directions, so be sure to make the drills run quickly and have the players clear the front of the net as soon as they are finished. I hope you find these drills helpful.
![]()
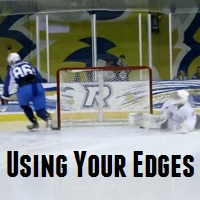
When you you get a chance to go one on one with a goalie you want to make sure you use all the tools in your tool box in order to be more deceptive. It seems many hockey players forget about their skating and edge-work when they try to beat the goalie. Sure it’s important to have good hands when you deke, but if you incorporate some edge-work into your dekes you can be a lot more deceptive and score more goals.
I recently uploaded this video breakdown to the How To Hockey Youtube channel. The actual deke is paused for the first 30 seconds while I set it up.
Wolski Deke Breakdown
Nick Bonino pulled out this beauty a few nights ago against Mike Smith.
Bonino Deke Breakdown
Teemu Selanne – Uses his edges a little differently here, he’s pulled this move a few times in Shootouts
Selanne Deke Breakdown
Another good example of edge-work in a deke is the Datsyukian deke which I explained a few months back. Of course you also need some pretty good hands (and some practice) to pull this one off, but the hardest part of executing the Datsyukian deke is using the edge of the front foot.
 If you want to learn the fundamentals of every move you can pull on a goalie, when to use them, and 20+ shootout / breakaway moves you can check out my Goalie Buster training course. I compiled a comprehensive list of pro shootout moves, organized them all into categories, and then shot over 2 hours of on-ice videos explaining each one. I currently still have the summer special price so take advantage of the lower price
 ![]() As usual if you don’t learn anything I will give you your money back.
As usual if you don’t learn anything I will give you your money back.
Thanks for reading – Be sure to subscribe to our Youtube Channel, and Blog (with the box below) to continue to improve your hockey skills.
