Home » Hockey Blogs » Recent Articles:

Easton Mako Skate Review

October 6, 2013 Hockey Blogs No Comments

Post image for Easton Mako Skate Review

Last year I caught wind of the Easton Mako and heard that it was going to break a lot of new ground when it came to hockey skates. Easton was working with a former speed skater-turned-hockey-skating-coach to design a new “faster” skate. In fact he started his own skate company and Easton bought it to utilize his designs and technology.  I thought the idea sounded interesting and was excited to see the new skate. That new skate is the Easton Mako and it has gotten a lot of attention lately. I requested a pair to review and Easton was kind enough to lend me a pair.

The Details – Easton Mako Specseaston-mako-skate-review

  • Retail Price$799 at Hockey Monkey ($499 for JR) (Note Easton has set a minimum price of $799 so for now it will be hard to find a better price)
  • Weight – 800 grams for size 9
  • Feel – Very comfortable without even baking them for my feet
  • Baking – The unique thing about these skates is they are supposed to be baked for a long time making them very pliable, then they are formed to your feet. The entire skate molds to your foot rather than just some gel inside.
  • More specs – For all the scientific specs about the skates check out the Hockey Monkey link above. Lets try them out!

Skating in the Easton Mako Skates

The first thing I noticed when I put the skates on was how comfortable they were. I didn’t try them on before I got them or have them baked to my feet. I just let Easton know my size and then got a pair of skates to try. I can’t even imagine how great they would feet if I actually had them baked and fitted properly. I go into more details on the fit and feel of the Easton Mako skates in the video below

Would I Recommend the Mako Skates

mako-skatesYes, but not to everyone. I love the skates, they feel great, they are light and they give me that natural skating feeling that I love.

I would recommend the skates to anyone who is looking for a high quality skate that will last, knows what they want from a skate, and can afford the steep price tag.

I would not recommend the skates to anyone on a budget or newer hockey players who are not sure what style, fit, and skate features they like.

Easton Mako Skate Specs

I won’t copy and paste all the specs here (you can find them on the Hockey Monkey Mako Page) but I found this video that covers them nicely (who want’s to read all the stuff anyways!)

The Journey to the Mako Skates

I thought that the story of how the skates were created was pretty interesting. Dave Cruikshank was a former Olympic speed skater that was obsessed with tinkering with his skates, and when he retired he was hired by an NHL team to teach their players. The problem was a lot of the drills didn’t feel right in his skates, so he created his own hockey skates.

My Overall Thoughts

mako-skateFor the price you pay you expect great skates, and that’s what you get. The skates are everything you look for, they are light weight, comfortable, and provide the speed and agility a player needs.

The most noticeable features for me were

  • The shape of the skates, they seem to follow the shape of a foot more than most skates do ( at least looking at them externally)
  • The way they lace up – It seems like the eyelets are more on top of the skates, rather than to the side, which seems to allow a snugger fit
  • They felt great when skating and were very comfortable
  • I noticed the liner was sort of tacky / rubbery which helped keep my feet in place
  • Apparently the heel is higher than normal skates, however I put on one pair of Mako’s and one pair of my other skates and did not really notice a difference there.

If you would like to get a pair check out the link at the top of the article, or if you are in the market for a cheaper skate you can always check out the bargain seection

How To Lift the Backhand – Backhand Challenge

Post image for How To Lift the Backhand – Backhand Challenge

We are on day 2 of the backhand challenge to shoot 1000 backhands in one week (if you want to know about future challenges be sure to sign up to our newsletter and Facebook page). After one day of shooting on your own I wanted to deliver some fresh tips for shelfing the puck when you are in close. In this post and video I explain the simple three step process to going top cheese!

Three Steps to Lifting the Backhand

lifting-backhand-shot-hockeyThis method is best used while in close to the net

  1. Puck location
    • The puck should be positioned forward in your stance to help you get the proper blade angle to lift the puck. A good puck position is not critical, however it does make the shot easier. Good players will be able to lift the puck from various locations, however it’s easier if you start from an easier position and work your way up.
  2. Wrist Movement
    • Starting with the wrists rolled and the puck cupped is important so that you can later quickly uncoil the wrists. This movement will add some momentum to your shot and help you easily lift the puck off the ice
  3. Leverage of the Stick
    • The final stage of this shot uses the hands and stick to add power and lift. You will be pushing down with your top hand, and pulling up with your bottom hand (quickly) in order to lift the puck up off the ice. When all three stages are used together (and with a bit of practice) you should have no problem roofing backhands.

Two Tickets to Bardownsville – Video Tutorial

Thanks for watching. If you want more tips you can subscribe to our website below. We also have buttons below to share this page :)

Take the Backhand Challenge

September 29, 2013 Hockey Blogs No Comments

backhand hockey

I thought it would be fun to do a quick challenge to help motivate hockey players (YOU!) to improve their backhands. In my opinion the backhand shot is the most neglected in hockey, almost every player I work with wants help with their slapshot. If you ask me the two most important shots for forwards are the snapshot and the backhand.

How the Challenge Works

The challenge is running from Wednesday October 2nd to Wednesday October 9th (join our Newsletter and Facebook page to be notified of new challenges). In that span of time you are challenged to take 1000 backhand shots.

Do I NEED to take 1000 shots? – No, you don’t have to, you could shoot more or less, but I encourage hitting the 1000 mark. The point is that you TRY to reach 1000 (about 142 shots per day) If you have 25 pucks you will need to shoot all of them 6 times each day.

Are there prizes? – Yes, everyone who enters (whether you get to 1000 or not) will be entered to win a free shooting analysis, my stickhandling guide, or access to my Goalie Buster training videos. I will randomly choose winners and the winners can pick which prize they would like. And of course everyone who enters wins…..a better backhand shot!

How do I enter?isnipe-thumb

  • First you can let some friends know that you are taking this challenge (challenge them to do it as well). Mention it on Facebook, Twitter, Instagram, real life, etc (use the share buttons below)
  • Over the course of the week keep track of how many shots you are taking. This can be as simple as writing your total down each day, or the preferred method (of course :) ) is to use the iSnipe app For Apple IOS or Google Andriod
  • At the end of the contest (Wednessday the 9th) send in proof of your total. With the iSnipe app you can click the i button to generate your log and then email it to me at [email protected]
  • I will randomly pick winners after a few days from all of the emails I receive with proof that you participated.

Problems with the Backhand?backhandproblems

Is that goal regulation size or what!? Don’t worry, the backhand is a tough shot, but I am here to help.

I will be posting two videos on my Youtube Channel to help with your backhand, so stay tuned to our Facebook page and Youtube. One video will show a neat trick for popping the puck up quickly, this will make you dangerous when in close. The other trick is to get more power from a distance.

Thanks for reading and sharing, I hope to have a lot of players participate and work on their shots.


Notes not being included on Practice Plan

September 21, 2013 Hockey Blogs No Comments

Views: 4221 | Replies: 1

Win A $2800 Full Backyard Hockey Rink Kit with Boards – Winner chosen Nov 10th 2013

September 18, 2013 Hockey Blogs No Comments

Post image for Win A $2800 Full Backyard Hockey Rink Kit with Boards – Winner chosen Nov 10th 2013

Jim from NiceRink.com contacted me recently and asked if I would like to host a contest on my site for the readers of How To Hockey, with the prize being a full backyard rink kit valued at $2800! Well, I think you know what my answer was. I am very happy to announce that one of the readers of this site could be skating on a 32 x 60 backyard hockey arena this winter for free.

What does the rink include?

  • backyard-rink-kitEverything you need (except the water) for a 32 x 60 outdoor hockey rink
  • A 40 width foot liner (premium quality, and ultra white)
  • 42 Nicerink brackets (to keep your boards standing up with all that water in the rink)
  • A 32 inch NiceIce Resurfacer (to get that ice nice and smooth)
  • 42 NiceRink 18″ x 4′ plastic boards (much nicer looking than plywood)
  • 21 BumperCaps (to hold the liner and provide fall protection)
  • 21 KickPlates (to protect the liner and boards)
  • 1 NiceRink Patch tape (to fix up any holes in the liner)
  • 1 underwater NiceRink repair adhesive (for emergency repairs)
  • 5 NiceRink hockey pucks (because you can never have too many pucks)
  • 1 LightUp puck
  • A very handy and helpful installation DVD

Learn about the entire Backyard Rink Kit in the Video

Enter into the contest

The more times you enter the better chance you have of winning!
a Rafflecopter giveaway

Are you thinking of Building a Backyard Rink?hockeyrink-backyard

Last year I published a very popular article on how to build a backyard rink, we also have an article with the top 10 questions when building a rink. If you are not very handy with building and you want a professional looking backyard rink that you can use every winter (with exception to replacing the liner every few years) then a NiceRink package will be perfect for you. If you are a “handy” type person, then NiceRink offers any component individually to help make your rink project easier. A NiceRink gold package includes everything you need to set up the perfect rink, all you need to do is set it up, and then fill it with water. The flatter your yard is the less water you will need.

How NiceRink can help you build a perfect Rink

awesome-backyard-rinkNiceRink can help you create endless Frozen Memories for your family. You want a nice looking backyard rink that is easy to assemble. NiceRink helps take a lot of the work out of assembling a rink by providing you with the four key components; NiceRink FULLY INTEGRATED side support Brackets, Thermoformed Boards, NiceRink Liners and the NiceIce Resurfacer. Whether you start small with a 20′ x 40′ kit and expand as you go, or jump in with both skates on a 44′ x 88′ Gold Package, NiceRink offers the most unique “personalized” self-leveling rink system, that actually works virtually anywhere. The NiceRink choices are infinite, the possibilities are limitless, and our product reputation is second to none. Start your own story today, let NiceRink help you create Frozen Memories of your own this winter.

Visit/Contact Us at:
www.nicerink.com
www.facebook.com/nicerink
www.pinterest.com/nicerink

Nicerink-end

Horacek Underneath Drill

September 18, 2013 Drills, Hockey Blogs No Comments

I picked this drill up watching former NHL player Tony Horacek running a practice with his team last week. I ran it with my team last night and really liked it. The drill takes a minute for everyone to understand their role but once it gets going it really has the players working to make good passes and understanding the underneath route to making headman passes. I’ve created a quick video to explain the drill just in case the document isn’t clear enough.

Make sure you have the player looping back into the zone make a good hockey stop and quick transition. I told my guys to act like there was a turnover in the neutral zone and they had to quickly get back to defensive positions. Hope you like this drill as much as I do.

Horacek Underneath Passing Drill

Cornell University Goalie Drills

September 10, 2013 Hockey Blogs No Comments

These drills work on some of the fundamental puck handling skills a goaltender needs to be able to master. It is extremely important to have a goaltender that can handle the puck, especially at the older age groups.

These drills can be used while working with the defensemen so that both the goaltender and defensemen can work on these fundamental skills.

Goalie Pressure

Goalie Sets

Goalie Wraps

.

Why You Need to be Your Own Coach

September 8, 2013 Hockey Blogs No Comments

Post image for Why You Need to be Your Own Coach

There’s an old saying in investing “no one cares about your money as much as you”. Something similar could probably be said about most hockey players “no one cares about your development as much as you”. Being your own coach is especially important for older hockey players.

Sure in minor hockey there are a lot of great coaches, parents and instructors, but even a great coach has about 15 hockey players who they are working with at any given time. Most hockey players get a few hours of practice per week on the ice, and the older the players get the more time is spent with systems and flow drills and less time is spent on skill development. So what is a player to do?

Jeremy Weiss from Weisstech Hockey made a good point here that I certainly agree with. Young players won’t be buying skills DVD’s or have the right mindset to become their own teachers, so for coaches and parents of young players it’s important to be a student of the game and also a coach. Stay up to date with new and fun ways to teach skills, continue to watch skills videos and review different coaching resources.

Be Your Own Coachcoach-blowing-whistle

A great coach will teach, challenge, and motivate you, but that doesn’t mean you can’t do anything on your own time! As a player you can’t just wait around for someone else to show you how to shoot, stickhandle and play your position.

What happens if you get a coach that focuses on systems for an entire year? That would be an entire year where you would not get any help with stickhandling, shooting, dekes, skating, or any other skills.

How can you coach yourself?

Teach Yourself

Before you can be a teacher, you first must be a student.

This is the most challenging part of being your own coach. In order to teach yourself you first must learn. There are a lot of great hockey resources out there. If you are trying to learn a skill you can look for instructional videos on Youtube (How To Hockey Channel with other channels in the sidebar) or instructional DVD’s (I learned more about stickhandling as a 14 year old from watching Sean Skinners stickhandling VHS tapes than I ever did from coaches).

If you are trying to learn about positions there are some good positional articles online (winger, Centerman, Another for wingers) and if you want more than just the basics you can study some hockey books. Some I recommend are Hockey plays and strategies and Jeremy Weiss’s playbook PDF for positioning, and Hockey Tough for great advice on mental training for athletes.

hockey-strenghtsYou also need to learn about yourself before you can coach yourself.

  • What are your strengths?
  • What are your weaknesses?
  • What areas of your game need the most improvement?

It pays to pay attention to these things while you practice and play so you have a better understanding of what you need to improve on. Push yourself and try challenging drills so you can better understand where you need to improve, this will help you find new exercises and drills to help with your improvement

For example I remember being run through a number of edgework drills. Because of these drills I realized that I was a bit off balance on my inside edge of my left foot when skating backwards and turning. This seems very specific, but it gave me something to work on and helped me find a deficiency in my game and my skating improved even more ever since I focused on that area.

Be Prepared

This comes along with doing your research. Being prepared means knowing what skills are involved in improving, and how you can improve those skills.

I found a great checklist from Hockey Canada that goes over all the skills that an initiation hockey player should learn (ages 4-7). How old are you, and how well can you perform these skills?

initiation-core-hockey-skills

Make a checklist of your own of skills you want to improve!

Motivate Yourself

Everyone is motivated differently, the great thing about being your own coach is that you know exactly what motivates you. Maybe it’s a cool video game, maybe it’s some type of food (like a juicy Harveys Hamburger), or maybe it’s just the sheer joy of improving and playing better.

Find something that will motivate you and use it to push yourself. If you want to skate faster, do your research, find some skating drills and off-ice workouts that will help you get faster, set a goal, and reward yourself with something that will motivate you to keep on training. Practicing and playing with friends is also a great way to help yourself stay motivated and improve

Set Goals

goal-setting
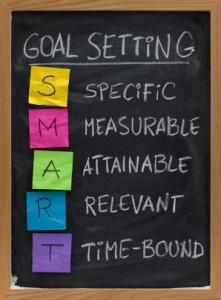
This is one of the most important steps of being your own coach. Lets say you want to score 30 goals in a season, if you make that your goal that is a great first step, but you still haven’t laid out a path to meet your goal. It’s a dream until you write it down, then it’s a goal, but to make it a reality you need a plan and you need to stick to it! Lets use the example below

Goal: Score 30 goals this season

Steps to achieve goal

  • Shooting practice 30 minutes per day
  • Take 2000 snapshots by end of month
  • Improve backhand power
  • Improve slapshot accuracy
  • Faster backhand to forehand transition and shot
  • Improve skating speed
  • etc, etc, etc

By laying out a DETAILED path to achieving the goal it is much more likely that your goal will actually be reached

Have Funhockey-fun

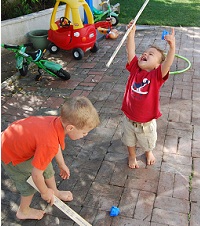
Learning and improving should always be fun, if you are doing workouts to improve your leg strength, or you’re running through a series of ladder drills to improve your foot speed why not put on your favourite music and rock out! Invite some friends over and challenge them to beat your times, create some competition, do anything to make your training a little more fun. If it’s fun, you will want to continue training and improving.

Make a Schedule

hockey-schedule
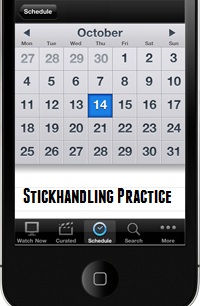
A schedule is a great way to stay on track when trying to achieve a goal. It’s too easy to say you are going to do something every day only to forget a few weeks later and go back to your same old routines.

Sit down and write out a reasonable schedule that fits into your current lifestyle and goals. If you are competitive your schedule might include daily training at home and at the gym. If you are a recreational player maybe you will only include two training sessions per week.

The important part of making a schedule is balance. Make sure each area of your game is addressed so you can continue to advance. Don’t be afraid to sit down a few months later and rethink your schedule. That way you can modify your schedule so it will continue to challenge you.

So I don’t need a coach?

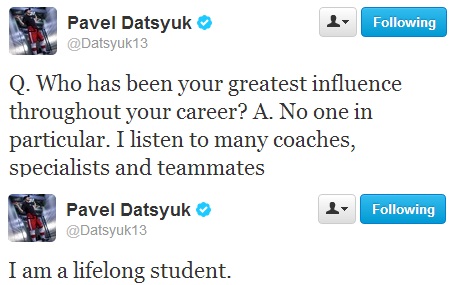
Wrong. You do need a coach, but to continually advance your skills and be a complete player you should learn how to be your own coach. Take the advice and suggestions you get from your coaches and then apply it at home. Pavel Datsyuk gave some good advice on his twitter

pavel-datsyuk-twitter

Take advice whenever you can get it, listen to any coach who has something to pass along, and work with others to improve your skills. When you teach yourself it helps to have direction, correction, and feedback from outside sources to help correct and bad habits you may have established.

For younger players this means asking questions from their coaches, attending power skating classes, and going to hockey camps if you can. Don’t be afraid to ask questions, or let the instructor know you want to work on something in particular.

Another fun way for kids to improve is to watch NHL highlights, there are a bunch of them on Youtube. Don’t just watch the moves though, watch the positioning of the players, their habits, and the small things they do that help them get into position to score those pretty goals.

listen-teammatesAllow your teammates to give you advice – Be a good student

Just like Datsyuk said above, “I listen to many coaches, specialists, and teammates”. Your teammates may know you better than your coach. Make it a habit to talk to your line mates about how you are playing, how they are playing, and how you can play better together. This will allow you to improve your game, improve your teammates game, and also improve your chemistry together.


hockeyplayerWhat if I’m to old to have a coach?

For older players this means reading hockey books, watching skill videos, talking about skills with other players, and attending adult skating lessons if they are available in your area. You can also watch NHL players and notice their habits and how they play and use that to guide how you play. Pay attention to the subtle things like how they get open, how they battle, when they use their speed, etc.

I like to think of myself as an online hockey coach, so feel free to email me with questions and problems you face and I will do my best to help you.

Resources

I recently published an article called the ultimate resource guide for hockey coaches. This guide can also be used by hockey players who want to further their knowledge of the game. There are links, downloads, books, and videos for everything from skill development to positioning and of course coaching.
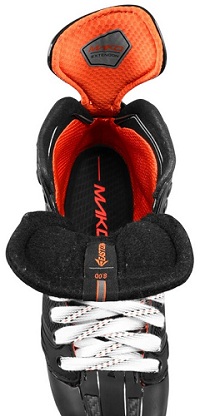
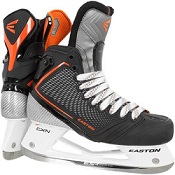
Team Canada Passing Drills

September 2, 2013 Drills, Hockey Blogs No Comments

Here are a couple of simple but effective passing drills supplied by the coaches of Team Canada.
When working on passing drills make sure your players stay focused on the fundamentals of a good pass.

  • Head-up
  • Stick on the Ice to receive
  • Tape to Tape
  • Good Pace on the Pass
  • Don’t get lazy and make sloppy passes

Each of these drills are run at full speed with timing involved. Make sure the players accelerate into the receiving zone.

Team Canada 2×0
Team Canada Outlet Pass

.

Hockey Shooting Analysis – Have your shot analyzed

August 31, 2013 Hockey Blogs No Comments

Post image for Hockey Shooting Analysis – Have your shot analyzed

I am pleased to announce a new service for a limited time. For the next month or so I will be offering a shooting analysis service for anyone who would like some 1 on 1 advice with their shot. Personally I think this will help a lot of players so I am very excited to help you guys out.

Update

I have got some great feedback so far from those who have taken advantage of the shooting analysis, here are a few comments I have gotten after sending the video

Hey Jeremy,
I tried your slap shot tips. Immediately saw my slapshot get 5x better. Thanks!.

Terri

Jeremy:
I thought your video analysis was excellent. I’m pretty impressed. People in my office were wondering if you do ones for golf and soccer.

Mark

wow, I am super impressed with your expert analysis! (you should be charging more)
I’m headed to the rink right now to work on all the tweaks you’ve highlighted…

Ray

Jeremy,
Can’t thank you enough. Your analysis was spot on. I am going to recommend my entire team send in their videos to you.

Jim

Thanks Jeremy, we got the videos everything was awesome… the kids are still outside practicing! Thanks again the kids (and I) are big fans.

Chev Hockey Dad

Nice that’s awesome.
The extra snap at the end makes a huge difference, I instantly improved my backhand when I started using it.

Lawrence


How it works

  • Take a video of yourself shooting (see my video example below so you know what angle to use)
  • Upload the video to Youtube (you can make it unlisted if you don’t want anyone else to see it)
  • Pay for the shooting analysis service with the button below
  • Email me a link to your video to [email protected]
  • I will download your video, review it and analyze your shot
  • I will upload my analysis privately and email you the private link as well as any further advice or recommendations

Only $19.99


Some Guidelines for your video

  • Make sure the video shows your body (as shown in picture below)
  • Please only use one type of shot per submission
  • Let me know what you would like to improve
  • Feel free to include extra information (position, things you want to improve, etc) either in your video or in your email

Let Get Started!

To get started shoot a video of your shot (on or off ice), upload it, pay with the button above, then send me the link