Coach Arena has been the head coach at Amherst University for over 30 years. In 2008-09 he won Coach of the Year honors for NESCAC and New England hockey writers ECAC East. In 2011-12 he won National Coach of the Year honors from the AHCA. I contacted Coach Arena and asked him if he would be interested in contributing a few drills to our site and he agreed. I told him I’ve been receiving many requests for half ice drills because so many teams now share ice to save on cost. Coach Arena supplied us with four very nice half ice drills that go beyond just small ice games. Take a look and see what you think.
I will add these drills to the Half-Ice section and also an Amherst College section for future use if Coach Arena would like to contribute additional drills.
I often run this ‘Shoot and Break‘ drill in my practice. I like it because it does 2 things:
Focuses on the drive toward the net and a quick shot
Breaking out with speed
In Game 1 of the Blues/Kings game, I saw a great example of how the first half of this drill works and how it can be effective. While it didn’t result in a goal this time, most times it would.
Watch the video as the play develops from about 6 second in to 10 seconds. Not a lot of time but you see how quickly Scwartz comes down the circle and to the net. Keys to the play:
Schwartz is skating hard
Schwartz has his stick down and in front of him ready for the quick shot
Notice there is no catching the pass, stick-handling the puck
Steen has his head up and make the perfect pass so Schwartz can shoot quickly
I just saw this yesterday and wanted to pass it along to all the readers. I’ve used the Play Manager software for years to do drill and system animations for my teams and now the developers have made the program available for FREE. You can use this software to also draw out your drills/systems and print them with the added bonus of creating animations as well. The software takes a little time to learn, but so do all animation packages, but once you learn how to use it, it can be very helpful. The developers stopped making updates to the program a few years ago but it still works fine. Bottom line is that it’s free and can be used for animations and drill drawing so it’s worth a look. Go to www.playmanager.com or click the image below.
Couple this software with some basic free screen capture software like Techsmiths Jing and a YouTube account and you can post your drills online for your team to watch.
The Pylon Plus can be a Great Way to Add Diversity to your Drills
I recently had a chance to check out the Pylon Plus. It’s a great little product, and gives you an easy way to add some diversity to your drills!
What you get
The Pylon Plus comes with the following items:
8 weighted pylons
8 plug inserts
6 extendable hurdles
1 durable carry bag
Instructional booklet with sample drills
Benefits of the Pylon Plus:
Kit extends up to 17 feet (over 5 m)
Can be used on or off ice
Collapsible for easy transportation
My Experience
I used the Pylon Plus for the first time during a camp I was running. I hadn’t messed with it before, and didn’t set it up properly. This made for a very sub-par experience. However, I realized afterward that I hadn’t pushed the insert plugs in far enough, which made it so the slightest bump would blow the whole unit appart.
After proper assembly, the Pylon Plus is actually quite durable, and can withstand a pretty good jolt without falling appart. So make sure you get those insert plugs set properly, and you’ll have a great time using this one!
I’ve been asked a lot over the years what I look for in a player during evaluations. After watching my son during various AA & AAA Ice try-outs, I’ve been thinking more about this topic and wanted to share a bit of what I look for and some other information that I’ve found or has been shared with me.
My friend Graham Acres (gacres99) also shared his thoughts with me.
Whatever it is you believe you do best, do that every shift.
Listen to what the coaches ask you to do and do that
Bring energy and never stop working every shift. Regardless of talent, coaches are attracted to kids who consistently work hard.
All good advice and greatly appreciated. So what is it that I look for when I run my evaluations? I can teach you to shoot, pass and skate. It’s those intangibles that will earn you a spot on my team.
Aggressive play – Be willing to battle for pucks. If you are on the forecheck, get on the puck. Don’t sit back and wait for them to come to you.
Backchecking – If you won’t backcheck, it’s the fastest way to get off my list. I need you to skate harder than you’ve ever skated when you are backchecking. It makes a HUGE difference.
Don’t give up – I don’t care if you just messed up, mistakes happen. It’s what you do after that mistake that I look at. Did you slam your stick? Throw you head back? Yell? Get back in the play and make up for the mistake you made. No one will remember the mistake if you made if you hustle back and make a difference in the play.
Come out to Earn your spot – Don’t think because you’ve been playing for xx number of years, you deserve a spot on the team. No on deserves a spot, you earn it. Everyone there is fighting for your spot, go out and get it.
Communicate – Talk to the coaches. Talk to the other players. Talk when you are on the rink and involved in the play. Call for pucks, direct the play. Be vocal.
Don’t be selfish – Yes it’s a tryout to earn a spot on a team, but that doesn’t mean showing off your ability to skate through every player every time with your head down. Be a play maker. Make passes. Make good decisions.
A few tips for trying out:
Relax and have fun. I know it’s easier said than done but remember, you can play the game so just go out and do your thing.
If a coach gives you some advice, make sure you go out and do that. They are hinting to you of what they want to see you do. At least try to do it. It shows you are coachable.
If a coach asks you to play a position like Defense, please, under no circumstances respond ‘I’m a forward’ or ‘My Dad says I’m a forward’. Just go out and do it. Coaches want a team player.
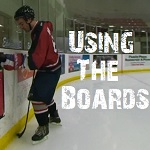
In this article and video Ken delivers three tips on how to use the boards in the defensive end. The boards are a great tool to have, and as a defensemen you should know how to use them. There are a few ways that you can use the boards or the glass to elevate your level of play. When you get the puck in the defensive end your number one goal is to move it out of your end, and hopefully also maintain possession. In the video Ken shares 3 ways to effectively use the boards and 5 different plays that you can make.
5 plays you can make using the boards
Using the boards as a Defensemen
Here are some of the points that we covered in the video
You can use the boards when you need to protect the puck, keep your knees bent and have some weight on your stick so you are not easily knocked off the puck. Remember your legs are the most powerful muscles, so keep them moving during the puck battles. You can also use your hands for leverage and support
Sometimes you need to make a cross ice pass to your defensive partner. If you are close to the net you do not want to put the puck right in front of the net. Use the boards behind the net to bank pass the puck to your partner.
A hard rim is a good way to get the puck up the ice quickly, but remember your winger needs to know how to handle a rimmed puck, and it usually takes longer to recover than a direct pass. Use a hard rim when you need to clear the puck quickly, it’s usually a safe play, but not always the best one
A bank pass up the ice is another good play to use, sometimes you want to make a pass to a centermen or winger who is crossing lanes, if this option is taken away then look to the boards. You may see a clear bank pass that will still get the puck to your forwards.
Another way to use the boards is by clearing the puck high and off the glass. This is usually your last option and only used when you really need to get the puck out. It’s like pulling the cord on the emergency chute
These tips should help you see the ice a little differently. Remember direct passes are great when you can make them, but usually the other team will try to take away passing lanes. You can look to the boards when your direct pass options are taken away, you need to move the puck up ice quickly with a hard rim, you can’t move the puck and need to battle or “eat the puck”, or in case of emergencies, throw it high and off the glass.
We talk a lot about positional play on this blog. Positional play is extremely important, but it’s only part of the equation! There are tactical elements that must be executed in any given scenario for the positioning to be worth anything. In other words, it’s great to be in the right place at the right time… but if you are doing the WRONG thing while you’re there, it’s useless!
Controlling the Stick
There are many instances in games where positional and tactical must be executed together. In this video you see situation where the Team Canada has a positional mix-up, and a forward ends up playing defense. He does a good job covering for the defenseman positionally, but tactically he makes the mistake of not controlling the Slovakian player’s stick, and it results in a goal against.
I purchased “The Beast” Peanlty Kill System DVD from Championship Productions two weeks ago and have watched it a few times since. My thought was that I would like to see what type of concepts Coach Arena was teaching that would be beneficial to my team. I have to say that if you are looking for some guidance on how to run a PK with your team this DVD will be a major help. Coach Arena goes through the entire system starting with the forecheck and continues through the neutral zone and into the defensive zone. His concept of keeping the 2 on 1 as far from the puck is spot on and if played properly can give your team an excellent chance to be a powerful penalty killing team.
Even though I’ve been coaching for almost thirty years I’m always trying to learn and improve, and I sure this DVD will help anyone who wants to teach his team how to be successful on the penalty kill. Championship Productions does a nice job with their video learning and if you haven’t checked them out yet you should give them a try. I recommend picking up a copy of “The Beast” Penalty Kill System, it’s well worth the small price tag.
On a personal note, after watching the video a few times I had some questions so I searched out Coach Arena and he answered my questions in detail and offered continuing help if I needed it.
Use the Bongo Board to Improve your Hockey Balance While Away from the Rink!
I recently had the chance to test out a number of new products from HockeyShot’s balance line. I’m a big believer that developing balance and coordination off the ice can lead to improved performance on the ice. The first product I tested out was the 20″ Wobble Board. The next product I checked out was the Bongo Board, which is shown in the video above.
Construction:
At first glance, the Bongo Board looks like a skate board without wheels. It’s made of solid maple plywood, and has a non-slip surface on the top. The underside of the Bongo Board has the track, with the bungee cord, which fits with the double ball bearing wheel system. The construction is durable, and able to withstand the rigors of regular usage.
Usability:
The Bongo Board will take some practice before you’ll be able to use it effectively. Although once you’ve figured it out, it’s a lot of fun (and a great workout too!). Athletes with a skateboarding background will likely pick it up faster than I did.
Once you’ve got the hang of it, there’s a lot of stuff you can do:
Kick Flips
Ollies
180′s
etc…
Obviously… for hockey, you’re going to want to “Bongo” while stickhandling!
Benefits:
The benefits of using the Bongo Board are pretty obvious for hockey:
Improved Balance & Control
Increased Coordination
More Strength in Calves and Ankles
Variety of Power Exercises that Executed
Great way to develop “independent” Hands & Feet (hands and feet are active together, working on different things)
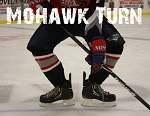
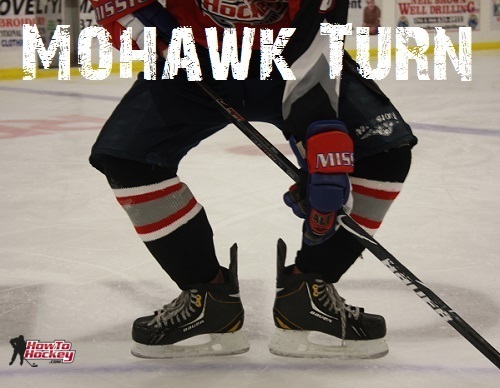
The Mohawk turn (some people call it the Eagle turn) is a fairly simple skating maneuver to perfect if you are already comfortable on your edges. One player who seems to use this move quite a bit is Sidney Crosby (when he’s not getting hit in the face with pucks). In order to perform the move the skater simply puts their heels together and points the toes out, this almost aligns the skate blades in-line allowing the player to carve or turn in a circular motion.
How to do the Mohawk Turn
First practice while standing still, you can even practice off the ice. Bend your knees a bit and point one toe out, now lift the other leg and point the other toe out, then step down (heel to heel). With your legs you should be making a “fat diamond” shape.
Now try the same thing on the ice (with skates on). It may be a bit harder because you are on your blades, but work on getting comfortable in that position and balancing.
When doing this move while moving you will be on both inside edges of the skates.
Mohawk Turn Video Lesson
In this video I show you how to do the Mohawk turn, a few drills you can use to get better at doing it, and a few game situations when you might want to use it.
When and Why you need the Mohawk
The move allows you to open up and see the entire ice while still moving
You can also use it to protect the puck while moving to an area you need to be
The move gives you more options while skating, with a push, or turn of a foot you can stop, keep going, or go forwards in a fraction of a second
Great to use when coming from behind the net
Use it when skating towards the net and calling for a one-timer (on your off wing)
Transitioning from skating backwards to going forwards
The Mohawk in Action Sidney Crosby
You can see Crosby using this move a few times in the clip below.
Thanks for reading! If you want to share this article or subscribe to our blog for more check out the widgets below.