Recently I saw a post on USA Hockey’s website talking about how the best teams in the world use small area games to improve their players.
How do the best teams in the world train?
Here is what some of our Olympians had to say about their NHL team practices.
When asked if they play small-area games in their NHL practices here is what the players had to say:
Dustin Brown, “We regularly play 2v2 in a small area to work on our battling skills”
Ryan McDonagh, “We use the small games to try and make plays quickly because you don’t have a lot of time or space.”
David Backes, “We do small area games for battling along with limiting time and space. At our level, making decisions must be done quickly.”
Ryan Suter, “The small games work on all skills that you need to play hockey.”
Ryan Miller, “The small area games we play help me to rely on reflexes as a goalie since your angles and landmarks have changed.”
Small-area games in practice help even NHL players stay at the top of their game
Personally I use Small Area Games at the end of every practice I run with my U16 team. I think they are a great way to develop skills in a “game like” situation and it really builds the compete level of all your players. I typically use the last 15 to 20 minutes specifically for different types of small area games which you can see in the Small Area Games section of this site. I don’t think you should rely on SAG for an entire practice but building in these games to your practice routine will really help improve your team and player skills.
Three years ago I published an article on the reasons to use Small Area Games in practice and with the above USA Hockey article I thought it would be a good time to post it again. Keep in mind it is over three years old so some of the things have changed since then, but it is still very relevent.
**************************************************************************************
In 1962, Thomas Kuhn wrote a landmark book entitled The Structure of Scientific Revolutions, in which he defined and popularized the concept of the “paradigm shift.” Years later, Dr. Stephen Covey brought the concept of paradigms and paradigm shifts to a much broader audience with the publication of his bestselling work, The Seven Habits of Highly Effective People.
In its most basic form, a paradigm can be defined as a model of something, or a very clear and typical example of something. Therefore, a paradigm shift takes place when the usual and accepted way of doing or thinking about something is changed. Quite simply, a paradigm shift is a change from one way of thinking to another.
I’m sure you’re asking yourself what any of this has to do with the sport of hockey. A great deal, actually. Over the past twenty years, our society has been constantly changing. Massive paradigm shifts have taken place in all aspects of society and sport. Think about the advances in technology and communication. In the early 1980’s, only a small group of believers could see a vision of a future that included things we now take for granted such as cell phones, laptop computers and the world wide web. Up until a few years ago, a large portion of the population still had not changed their belief that the internet was just a fad that was only of use for a select few.
Now think about the advances that have taken place in the areas of sport science and athletic training. Athletes today are bigger, stronger and faster than ever before. Strength and conditioning programs are now sport-specific. Sport scientists on the cutting edge are constantly redefining the accepted theories on optimal athletic training and improving both the athletes and the sports in which they are involved. In reaction to both scientific and common-sense realizations, many sports now contain practice routines that look vastly different from what they may have twenty years ago.
I will now ask you to think about the typical hockey practice in our country. Does the typical practice session look any different than it did twenty years ago? I would argue that it does not. Hockey is one of the few sports in the United States that has not embraced change. Many of today’s hockey coaches, from the youth levels through the
professional ranks, hold fast to the belief that what worked for them twenty or thirty years ago will work for today’s players.
If we define a paradigm as a typical example of something, then what is the American hockey practice paradigm? In watching hundreds of hockey practices every year, I am amazed at the similarities most practices contain. Here’s what I see:
• A slow moving warm-up that typically includes stretching muscles while sitting or lying on the ice.
• Skating drills that are not specific to game situations or designed to build and improve technique.
• A few flow drills such as 2 on 0’s or 3 on 0’s which typically result in players skating at much slower speeds than they would in a game situation and making passes and taking shots that would not be an option in actual competition.
• A number of different team drills, such as 5 on 0 breakouts, which consume a great deal of time and don’t allow for the number of quality repetitions players need to fully develop a skill or grasp a concept.
• Practices finishing with traditional conditioning drill such as Herbies or sideboards. Even though we’re training for a sport that requires quick bursts of power and energy, and science has proven that skating technique begins to break down after about 20-25 seconds at top speed, our coaches insist on skating players in a single drill for up to two minutes to “condition” them.
Does any of this look familiar to you? As a coach, do you see practices that are run like this? Do you run your practices like this?
Our current paradigm is outdated. Twenty and thirty years ago, players could overcome the type of practice routine outlined above by developing their skills on the pond or the outdoor rink. Outdoor rinks would be crowded with kids of all ages, developing and honing their skills while playing the game and having fun. No adults to organize and criticize. No whistles, no talk, no overzealous parents screaming from the stands. Just the players and the game.
Society has changed and hockey has changed along with it. Players are no longer spending their days on the pond or the outdoor rink. There is too much structure and too many other options to occupy their time. Every day coaches in our country have conversations lamenting these facts and longing for the good old days, wishing things would return to the way they were. But we all know that things are not going to go back to the way they were. Rather than giving in to this realization and deciding that there just isn’t anything we as coaches can do about it, I would argue that we need to be more creative with our practice time. It is up to us to help our players learn the skills and hockey sense that once came naturally from time spent on the outdoor rinks.
It’s time to make a paradigm shift. It’s time to make small-area games the cornerstone of our hockey practices. Using small-area games in your practices is a great way to bring the feeling of the outdoor rink indoors. Players work harder, learn more and have more fun when practicing with these drills.
We will take a look at the what’s, why’s and how’s of small-area games as well as provide you with some different games that you can begin to use in your practices today. Make the paradigm shift. Your players will thank you for it.
WHAT ARE SMALL-AREA GAMES?
Before examining the reasons for using small-area games in practices and the benefits these games provide, we must first define what a small area game is.
Small-area games are game-like competitive drills that utilize a playing surface that has been reduced in size. A typical small-area game will be played in one end of the ice and can be played cross-ice, between face-off dots, in one corner, below the face-off dots or in any other number of areas, including the neutral zone.
The area of the rink being used is dependant upon the skills being taught. Most games are designed to teach a combination of individual skills and are most easily played in a cross-ice format. However, some games will be moved into a much smaller section of the rink to create a smaller playing surface while other games will take advantage of a much larger area to teach team skills such as breakouts or power plays.
The number of participants is lowered in small-area games. Any combination of players can be used. Again, it depends upon the situation, the level of play and the skills being taught. Teams can have anywhere from one to four (or more) players and will compete against other teams that may or may not have the same number of players. Coaches can choose to add support players or station themselves in a position to become part of the game to receive and give passes or create any number of potential odd-man situations within a game.
Special rules and conditions are applied to small-area games. Even though I am dedicating a section to this topic later in this guide, it is important to mention here that small-area games are created to mimic different situations that are seen in a regular game. While games can be played without any special rules or conditions, it is usually these small modifications that keep the games fresh and allow players to see many different offensive and defensive situations.
Small-area games are designed to focus on multiple skills and situations, increasing puck touches and situational repetition. During a small-area game, players will have more puck touches because of the reduced size of the playing area, the reduced number of players and the special conditions placed on each game. At any level of play, an average player may only have control of the puck for a few seconds during the course of a game. Depending on the game being played, that same player may have over a minute of competitive puck-possession time while taking six or seven shifts in just one ten-minute game. Within every small-area game, players are also placed in more tight situations and have more attempts on net than in any traditional drill I’ve seen – all while competing and having fun.
An often overlooked benefit of small-area games is the positive effect they have on goaltenders. Goaltenders, arguably the most important part of any team, are often the most neglected players in practice. Most drills provide shots that either don’t challenge the goaltenders, come so quickly that the goaltender does not have time to recover properly, or come at a pace that does not adequately duplicate conditions seen in a real game. Goaltenders thrive in small-area games because they are seeing live competition and – much like a skater getting quality puck touches – can face as many shots in one ten minute small-area game as they will see in an entire regulation game.
So who uses small-area games, anyway? Small-area games are nothing new to the Europeans. They’ve been successfully using competitive games in their practices for years. Recently, small-area games have become more commonplace in North America as well. They are used extensively in many professional organizations, colleges, junior programs and USA Hockey’s National Team Development Program. Many successful high school and youth programs have implemented small-area games as a major means of teaching skills and team concepts as well.
WHY USE SMALL-AREA GAMES?
The reasons for using small-area games as the main teaching tool in youth hockey practices are numerous. We’ll spend some time in the following pages looking at a number of great reasons to use small-area games.
Before looking at those reasons, though, we must take note of the fact that while using small-area games in practices is a relatively new concept, small-area games are not a new concept. Kids have been creating small-area games forever. Pick-up or shinny games on outdoor rinks or ponds have rarely featured the nets set nearly 200 feet apart. Street hockey games rarely cover half of a city block. These games, whether on ice or land, have traditionally taken place in a small area.
Not coincidentally, when long-time hockey coaches or enthusiasts discuss what is missing from today’s game, the discussion often centers around the lack of shinny or street hockey that exists in today’s society. Kids have interests and options outside of hockey and the world is a much different place than it was even twenty years ago.
With that in mind, coaches must find a way to bring the fun and skill development from the outdoor rink indoors. Small-area games are the most effective way to accomplish this important goal. Here’s why:
Small-area games promote creativity and experimentation. Too may of the drills we use today are scripted and include a pre-determined outcome. Nothing in the game of hockey is predetermined. Full-ice 1 on 1 drills, 2 on 0 or 3 on 0 drills done at half speed and any number of other drills that are commonplace in our practices do not replicate actual game conditions. Through the continued use of these drills, we eliminate the thought process and decision making skills of our players. Small-area games produce situations that our players will see time and again in competition. Through trial and error, they will develop many different options to create plays and experience success.
Small-area games create a more competitive practice environment. Competition is fun. More than that, small-area games push players to work harder, compete at game speed and learn to succeed against competition.
Small-area games eliminate the need for traditional conditioning drills. Hockey is a game comprised of short, explosive bursts of power. Shifts are short – typically anywhere from 30 to 50 seconds – and are followed by periods of rest two to three times that long. Logic should tell us that we should train our players in the manner in which they will play. Unfortunately, that’s rarely the case.
Many coaches insist on their players skating a variety of lengthy endurance drills – we know them by many names – such as Herbies and sideboards that force players to attempt to skate at top speed for up to two full minutes. Of course, we know it is physiologically impossible to skate at top speed for this long. Without going into a detailed discussion, what actually happens during these drills is that players will gradually lose knee bend in the skating stride, bend their backs and lose the ability to fully extend the stride leg at a proper angle. Thus, through the continued use of these endurance drills, coaches are actually creating slower skaters by systematically destroying skating mechanics.
Small-area games provide an intense environment in which to train while maintaining a proper work-to-rest ratio for players. Coaches using small-area games in place of traditional conditioning drills will find that their players are more willing to “work” in practice because they are having fun and competing. Players will almost always ask for one more shift in a small-area game. How many players are begging their coaches for a chance to skate six sideboards one more time?
Small-area games keep more players moving. Have you ever witnessed a hockey practice during which a drill is run with one player at a time skating through the drill while fifteen other players stand in the corner and watch? What are these drills accomplishing? The game of hockey is not played one player at a time. More than that, hockey is a sport in which skills can only be gained through continuous proper repetition. How many quality repetitions can a player gain in a twelve minute drill when only one player at a time takes part in the drill? As we’ve already discussed, there was a time when players could overcome this type of practice structure by going to the outdoor rink to sharpen their skills. Players rarely visit the outdoor rink anymore. Therefore, practices must be designed to allow players the quality repetitions they need to improve. A twelve minute 3 on 3 game played with eighteen players can give each player upwards of six competitive shifts in which they could have more than fifty puck touches and perform every skating maneuver imaginable. This is all done within a system that develops teamwork, camaraderie and hockey sense.
Small-area games develop and improve individual and team skills. Players can develop and improve every skill related to the game of hockey through the use of small-area games. The next chapter of this manual is dedicated to taking a look at a number of the skills that small-area games can be use to teach.
Players learn to excel in tight situations. The modern game of hockey is played in small areas and in tight situations. As players continue to get bigger, stronger and faster, the rink continues to shrink and there is less room to execute. Training to play in these situations through the use of small-area games will strengthen players and teams by practicing for these tight playing conditions on a daily basis. As players get more comfortable playing and practicing in small areas, they are better able to execute skills and systems in competition.
Your players will develop game strategies, make better decisions and have greater enthusiasm for practice. The bottom line is, when players see a situation develop in a game that they have seen hundreds of times before, they’ll know how to handle it.
Players can’t be expected to make proper decisions and go to the right place on the ice during a game if they have never been trained to do it. Where does hockey sense come from? For some players it may be an inborn trait, but for most players hockey sense comes through experience. If they’re not on the outdoor rinks playing pick-up hockey, where is that experience going to come from? It has to be built into practices.
Another common complaint from coaches is that kids don’t want to practice; they just want to play games. “Practice is boring and the kids just want to have fun. The kids won’t work hard at practice, so nothing gets accomplished.” This may very well be true for a number of coaches and teams. It’s true; if the kids aren’t having fun they won’t work as hard. If your players want competition, give it to them. Give it to them on a daily basis in the form of small-area games and watch as the attitude and the level of play consistently improves.
Players of all ability levels improve. I hear from many coaches, mainly at the youth level, that they feel they can’t run effective practices because of the diverse talent levels within their team. Combined practices are another concern. How can coaches challenge all players and keep practices flowing? By using small-area games and pairing players of like abilities together, all players will be challenged, but not overwhelmed.
Small-area games are an outstanding option for both highly talented teams and in-house youth teams. Why? Better players are able to flourish and improve more rapidly when placed in competitive situations against other highly skilled players. They’re constantly challenged to do more because of the small space in which the games are played. In small-area games, weaker players are going to be involved in the play more often and have an opportunity to develop their skills in a competitive situation. They’ll improve over time while having fun and feeling more like a part of the team. Players of all skills levels will be challenged, competing and having fun.
Small-area games foster a love and enjoyment of the game because players and coaches have fun! Hockey is the greatest game in the world and it should be an enjoyable experience for everyone involved. Implementing small-area games in your practices will raise the enthusiasm level of your players and give them something to look forward to in each practice. Happy players fall in love with the game and will want to continue coming back to the rink. It’s no different for coaches. You’re a better coach if you’re having fun and enjoying yourself. Teams model themselves after their coaches. A happy, hard-working coach with a great attitude will produce a team with similar traits.
WHAT SKILLS CAN BE TAUGHT USING SMALL-AREA GAMES?
As coaches, we all have our tried-and-true methods of teaching specific individual skills. In no way am I advocating that we dismiss traditional individual skill training and the drills that are used to teach those skills. Rather, I would make the argument that it’s what we do in addition to our traditional drills and teachings that will have the most profound impact on our players. That’s where small-area games come into play.
Virtually any individual or team skill can be taught through the use of small-area games. Of course, just as in a real game, virtually every skill imaginable is needed and will be practiced in a small-area game. This is accomplished in a learning-friendly environment in which the players are having fun. As a coach, have the courage to allow players to figure things out for themselves and let the game teach the game. Here’s a very brief look at some of the skills commonly taught through the use of small-area games:
Skating. Every skating maneuver is needed in small-area games. Lateral movement, stops and starts, tight turns, transitions, crossovers and the forward and backward stride will all be practiced in virtually every game.
Passing. Nearly every game incorporates passing as an integral part of the game. Rules can be applied to games requiring a number of passes prior to a shot on net or require players to give and receive passes from support players.
Shooting. No traditional drill will allow players to attempt as many shots under competitive playing conditions as a typical small-area game. Players are encouraged and required to use a variety of different shots, including the nearly-ignored backhand, and attack the net to capitalize on rebounds.
Stickhandling. Every player has the opportunity to handle the puck a great deal in small-area games. More than simply handling the puck, they’re required to do it in tight areas and under pressure. In my experience, this is the optimal way to become a better puckhandler.
Cycling. Many small-area games can be designed to give players the opportunity to work the puck low in the offensive zone. Competitive games allow players to develop the ability to work together to control the puck deep in the offensive zone while under the same type of defensive pressure they would typically face in a real game.
Transitioning. One of the trademarks of small-area games are the continual transitions players must make from offense to defense. Forwards and defensemen alike are put into situations that they would rarely, if ever, see in a traditional drill; yet routinely have to face during actual competition.
Angling. Because defenders are placed into a variety of real-game situations in small areas, they learn to close gaps and cut angles with a great deal of skill.
Breakouts. Games can be designed to incorporate breakouts and forechecks. This creates an excellent opportunity for teams to practice specific plays during a live, competitive situation.
Power plays. Many small-area games provide odd-man situations that closely replicate typical power play alignments such as the overload and the umbrella. Conditions and rules regarding the number of players on each team and their positioning can be implemented to meet specific needs.
Puck support. To achieve success in most any small-area game, players must learn to properly support the puck carrier and position themselves to receive passes, anticipate turnovers and run interference for teammates.
Hockey sense. Hockey sense is a skill that a coach cannot teach. Players only gain hockey sense through experience and repetition. Over the course of a season, small-area games can give players hundreds of quality repetitions in various situations that are commonly seen in real games. Traditional drills are all too often scripted, eliminating the thought process and decision making skills. Outcomes of small-area games, while containing specific guidelines and rules, are never predetermined.
Remember, these are just a few of the numerous individual and team skills that may be learned and practiced through the use of small-area games in your practices.
ORGANIZATION OF SMALL-AREA GAMES
Simply using small-area games in practice is not enough. The coach must take steps to make sure that games are properly organized to ensure maximum player development and learning through maximum effort. Some of the important considerations in organizing small-area games include:
Be creative. Creativity is a key to keep small-area games and practices fresh and exciting. The types of games that can be played and the rules they are played by are limited only to the imagination of the coach.
Length of games and shifts. Coaches need to take the length of games and shifts into consideration when drawing up their daily practice plans. How long should a game be played? While two minutes is probably too short a time period, twenty minutes is probably way too long. Typically, durations of between eight and twelve minutes will provide satisfactory time for several quality repetitions while holding the interest and attention of the players.
The length of each shift is equally, if not more, important than the length of the game. Since we are trying to duplicate game conditions during practice, a good rule of thumb is to keep shifts relatively short – no longer than a typical game shift. In fact, given that most small-area games require even more effort and involvement than a typical game shift, small-area game shifts should be kept shorter to prevent a breakdown of technique. Thirty to forty second shifts are usually sufficient.
Teaching points. Every small-area game has a focus and points of emphasis relative to skill training and development. While many different skills and techniques can be taught within any small-area game, the coach must choose a small number of teaching points for each game and stick to those points. While it is natural for a coach to want to critique any and all areas where he or she sees a deficiency, it is important to keep players focused and the lessons each small-area game is designed to teach and not burden players with extra thoughts that will restrict creativity.
Enforcing rules, technique and discipline. The key to enforcing small-area game rules, as well as monitoring technique and discipline, is having a minimum of one coach assigned to each game. It is the responsibility of the head coach to make sure that each member of his or her staff completely understands each game and is on the same page.
Know your players. In creating any practice plan and considering which drills are appropriate for a team, the most important factor for any coach is an absolute knowledge of his or her players. Small-area games that are too easy for players will get boring and games that are too hard and require players to perform tasks that are too advanced will lead to frustration and decreased effort.
Know yourself and your coaching style. To be an effective leader, a coach must have a true understanding of himself or herself. You can’t improve on something you don’t understand. As coaches, we are (hopefully) always seeking to improve. Many times improvement comes through mistakes that are made and recognized. Hockey players are no different. Players make mistakes and learn from those mistakes.
Small-area games are designed to allow players to make – and learn from – mistakes. Coaches can certainly coach and point things out during small-area games, but should be careful not to overdo it. This is why coaches need to know themselves and have an understanding of their coaching styles. A coach that tends to over-coach or has a tendency to be very vocal will need to scale back on that behavior. Constantly barking orders during the games will only serve to distract players and reduce creativity and the learning process. Let the game teach the game!
CONDITIONS AND RULES OF SMALL-AREA GAMES
Every small-area game is governed by a number of conditions and rules that dictate how the game will be played and which skills and concepts will be highlighted. Conditions and rules must be closely followed; otherwise the game may not help players accomplish the predetermined goals.
Conditions and rules are what separate and distinguish one small-area game from another. Coaches must feel free to use their imagination and understand the needs of their team when designing a game. The only limit on the number or type of games is the coach’s creativity. Here are just a few of the important considerations to make when applying conditions and rules to small-area games:
The placement and number of nets. Where the nets are placed and how many nets are used may the most important consideration a coach can make when implementing a small-area game in a practice. The most common mistake made by coaches when placing nets in small-area game is to simply place the nets against the boards when playing cross-ice. Small-area games are used as a means of replicating real game situations and the nets are not placed against the boards during a real game. Unless there is a purpose for placing the nets against the boards, move them out and give players space to operate behind the net.
Another consideration revolves around the number of goaltenders that will be involved in the practice session. Many youth teams may only have one goaltender available at any given practice session. In these situations, implementing drills that only require one goaltender and/or having a quality net cover available for the second net would be advisable. Many high school or college programs, as well as youth teams sharing practice ice, may have three or more goaltenders on the ice at any given time. Again, the coach must plan ahead to ensure that each goaltender receives and adequate amount of work.
Increase or decrease the area of play. Expanding or reducing the area of play will have a tremendous impact on any small-area game. Reducing the area of play will require players to focus on puck protection, lateral movement, stops and starts and puck support in addition to many other skills. Increasing the area of play will free up the ice, allowing players to carry the puck more, make and receive more passes and reach higher skating speeds while still having to function in a limited space.
Add support players. Many of the games illustrated in this manual allow for the addition of support players. Support players are typically added to create odd-man situations and opportunities in an even strength game. Support players can play for one or both teams and are typically confined to specific spots on the rink. Coaches can choose to have support players perform certain functions and may also choose to limit what support players may do, such as not allowing them to shoot the puck.
Increase or decrease the number of participants. A simple way to change the look and feel of a small-area game is to increase or decrease the number of participants. Adding players to a game will immediately decrease the amount of available space on the ice. Conversely, decreasing the number of players will open up the ice and allow for more free-flowing movement.
Confine players to specific areas. Restricting players to a certain area on the ice is an easy way to create mandatory odd-man situations for the offensive team. Players can be confined to one end of the ice, be forced to stay above the face-off circles or below the goal line, behind the net, in a corner or placed in a stationary position at any given location. Different rules and conditions may be applied to these players than are placed on other players in order to affect the flow of the game and target specific skills.
Require a certain number of passes or puck touches. Requiring each team or player to make a certain number of passes or touch the puck a number of times before attempting a shot on net is an easy way to work a number of skills including passing, receiving a pass, puck support, creating time and space and a better ability to read the ice. Placing these types of conditions into a small-area games force offensive players to work harder than usual to find open ice as defensive players are aware that a shot cannot be taken until the requisite numbers of passes or puck touches are made. Defensive players are more likely to play the man aggressively in these situations.
CONCLUSION
In the opening section of this guide to small-area games, we took at look at the current paradigm of American hockey practices. Hopefully, as you’ve begun to study small-area games and what they can do for your players and teams, you’ve experienced the beginnings of a paradigm shift.
As you introduce small-area games into your practices, I ask that you stick with them for a while. In the initial few practices in which you use small-area games, the games are sure to look like organized chaos. Most players, due to their lack of overall hockey sense and decision-making skills, will not know how to react to the play taking place around them. However, when given a chance to develop, these same players will begin to make plays, get themselves into position and display skills that were not visible only days or weeks earlier.
I encourage you to create your own games and implement them into your practices. Know your team, know your players, be responsive to their needs and have fun!
One area that I have not addressed in this guide is the amount of practice time that should be devoted to small-area games. I intentionally ignored this subject because I believe that it is unique to each coach and his or her team. Some coaches use one game per practice while others practice almost exclusively with small-area games.
I truly believe that small-area games should be the cornerstone of your practice plans. At this point, if you still haven’t experienced a true “paradigm shift”, begin slowly by implementing one small-area game per practice in place of your traditional conditioning drills. Experience tells me that you’ll soon be using this wonderful teaching tool as a much larger part of your daily practice regimen.
Beyond that, I wish the best of luck to all hockey coaches. Have fun teaching this great game and enjoy the young men and women you have the privilege to work with. You are a part of their lives and they will remember you. Make those memories special.


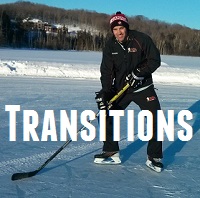
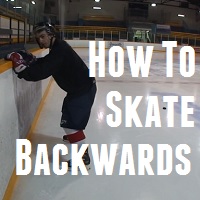
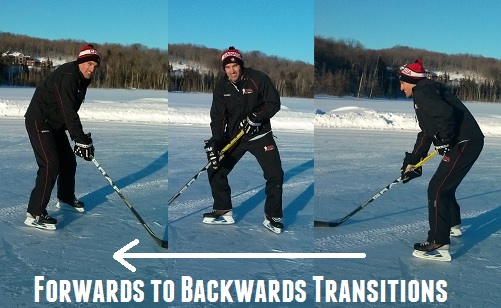 With the forward to backward transition there are three simple steps. Remember to always pivot towards the play. In this scenario I am rotating to my left
 The backwards to forwards transition is a little easier then the forwards to backwards. It follows a similar system of transferring weight. In this example I am rotating / opening up to my right. Remember to always turn towards the play (chest is always facing the puck)

 Slapshot – This is the most powerful shot and you typically want to use it from a distance. You need a bit of room to wind up so don’t try this shot when being heavily pressured. A variation is the one-timer which is great from the point, or when you are in close and need to get the puck to the net as fast as possible. Stamkos is known for his deadly powerful and accurate one-timer